


83
Handling Paper and Other Media | 83
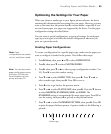
Optimizing the Settings for Your Paper
When you choose a media type in your Epson printer software, the driver
automatically determines the best settings for your paper. However, you may
want to fine-tune how the printer handles various media—especially if you
use non-Epson paper or a paper not supported by the driver. Use the paper
configuration settings described below.
You can create a special configuration, or group of settings, for each paper
type (up to ten types) and select the desired configuration whenever you
print on a particular stock.
Creating Paper Configurations
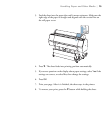
To create a configuration for a specific paper type, make sure the paper you
want to configure is loaded in the printer. Then follow these steps:
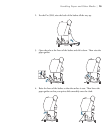
1. Press r
Menu, then press u or d to select PAPER SETUP.
2. Press r, then press d to select
CUSTOM PAPER.
3. Press r, then press d or u to select a paper configuration number (1 to
10). Press r to save the number setting.
4. Press d or u to select
PAPER TYPE, then press r. Press d or u to
select a media type, then press r. Press
OK to save it.
5. Press l twice to go back to the previous menu.
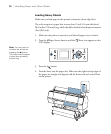
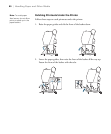
6. Press d or u to select
PLATEN GAP, then press r. Press the d button
to select
NARROW, STANDARD, WIDE, or WIDER. The
STANDARD setting is recommended for most paper types. Press OK to
save the setting, then press l to go back to the previous menu.
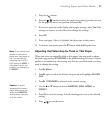
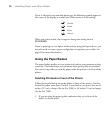
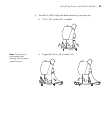
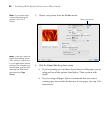
7. Press d or u to select
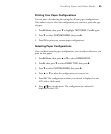
THICKNESS PATTERN, then press r. Press OK
to print the paper thickness pattern. A pattern similar to the following is
printed:
Note: Paper
configurations are needed
only for non-Epson media.
Note: You can also create
paper configurations using
the Epson LFP Remote
Panel installed from the
printer software CD.
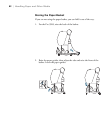
1 2 3 4 5 6 7 8 9 10 11 12 13 14 15
Smallest gap