


Calibrating Your System 2-3
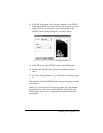
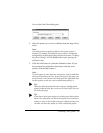
4. Click OK. Your setting is automatically saved as a new screen
calibration profile.
If you use a different monitor or change your video display
resolution, calibrate your screen again.
Enabling Screen Calibration
Once you have calibrated your screen, you need to make sure
screen calibration is enabled. Follow these steps:
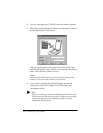
1. Start EPSON Scan! II, if necessary.
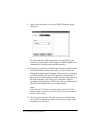
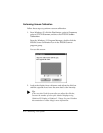
2. From the File menu, choose Acquire. You see the TWAIN
screen.
If the screen is fairly small and has an Advanced button, it
is the easy screen (pictured on page 3-3). Click Advanced
to switch to the advanced screen. If the screen is large and
has a Configuration button, it is the advanced screen
(pictured on page 3-3).
3. Click Configuration to open the Configuration dialog box.
4. Make sure the Enable Screen Calibration checkbox is
selected. If it isn’t, select it to enable screen calibration.
5. Click OK.
6. Close the EPSON TWAIN screen.
When screen calibration is enabled, TWAIN uses it as it scans
images until you change this setting.