3
Using the Interface Card with NetWare
3-9
R4C3610 Adm/G
Rev. C
A5 size Chap3.fm
8/4/00 Pass 0
R
Proof Sign-off:
KOW M.Arai K.Nishi
K. Nishi
J.Hoadley
❏
Deleting a queue
Select the print queue you want to delete, right-click it,
and then select
Delete Queue
.
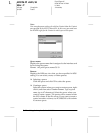
Queue list box:
List of queues that are assigned to the print server.
Add button:
Adds a queue to the print server. Browse the queue and then
click the Add button.
Remove button:
Remove a queue from the queue list box.
8. After making the settings, click
OK
. The Password dialog box
appears.
9. Enter your password (up to 20 characters) and click
OK
to
save settings. If you are entering a password for the first time,
click
Change
and set the password. For more information
about passwords, see “About passwords” on page 9-7.
Follow the on-screen instructions. After updating is complete,
refresh the configuration by selecting
Refresh
from the View
menu.
c
Caution:
Since it takes 2 or 3 minutes to send new settings to the
interface card, you must wait until the on-screen message
appears before turning off your printer.
Note:
❏ Since the new settings are sent to the interface card, you must
wait until this message appears before turning off the printer.
❏ Printer Objects (named PR0) are automatically created when
you save the settings using EpsonNet WinAssist. Use
PCONSOLE or NWADMIN to change the printer name.


