


3-34
Using the Interface Card with NetWare
R4C3610 Adm/G
Rev. C
A5 size Chap3.fm
8/4/00 Pass 0
L
Proof Sign-off:
KOW M.Arai K.Nishi
K. Nishi
J.Hoadley
❏
Public Access Printers:
NDPS printers that are available to all network users and not
associated with an NDS object. Users can select and print to
any public access printer they can view from their
workstations. However, these printers do not take full
advantage of services such as security and job event
notification.
❏
Controlled Access Printers:
NDPS printers that are added to the NDS tree by NetWare
Administrator. They are only available to the workstation
user through the NDS object list. These printers can take full
advantage of the security and management features provided
by NDS.
1. Select the printer type either public access printer or
controlled access printer.
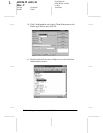
2. Create a public access printer. If you want to create a
controlled access printer, go to step 3.
In NetWare Administrator, double-click the NDPS Manager
you have created. Click
Printer Agent List
button, then click
New.
Enter the Printer Agent name, and select
Novell Printer
Gateway
for the Gateway Type. Click
OK
. Go step 4.
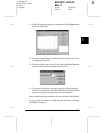
3. Create a controlled access printer.
In NetWare Administrator, select the Directory context icon.
Select
Create
from the Object menu, then select
NDPS
Printer
. Enter the Printer Agent name, select
Create a new
Printer Agent
, then click
Create
. Select the NDPS Manager
you have created, and select
Novell Printer Gateway
for the
Gateway Type. Click
OK
.
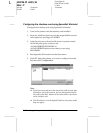
4. Select
None
for the Printer Type, and
Novell Port Handler
for the Port Handler Type. Click
OK
.
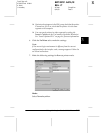
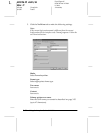
5. Select the Connection type, and configure it as follows.