


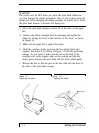
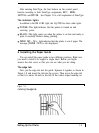
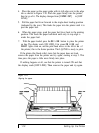
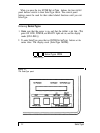

4. Place the paper on the paper guide with its left edge next to the edge
tab as shown in Figure 1-10. Push the paper firmly into the printer,
then let go of it. The display changes from
[PAPER OUT]
to [OFF
LINE].
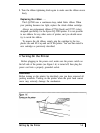
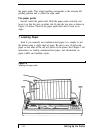
5. Pull the paper bail lever forward to the single-sheet loading position
(indicated by the icon). This feeds the paper into the printer until it is
past the paper bail.
6. When the paper stops, push the paper bail lever back to the printing
position. This feeds the paper backward until only its top edge is
under the paper bail.
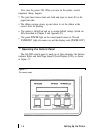
7. With the paper loaded, press the
ON LINE
button to place the printer
on line. The display reads [ON LINE],
the
green
ON LINE
and
READY
lights come on, and the print head moves to the left
side
of
the printer; this is the
home
position. The LQ-2500 is ready to print.
If the platen (the black roller) turns but the paper does not load,
remove the paper from the printer and try again, starting at step 3. This
time press the paper a little more firmly into place.
If nothing happens at all, see that the printer is turned ON and that
the display reads [OFF LINE]. Then remove the paper and try again.
Fiqure 1-10.
Aligning the paper
1-12
Setting Up the Printer