5 OPERATING ENVIRONMENTS AND STARTING PROCEDURES
16
EPSON
S5U1C17801T1100 HARDWARE MANUAL
(SOFTWARE EVALUATION TOOL FOR S1C17801)
(2) Turn on the PC (if it is turned off).
(3) Connect the evaluation board to your PC via a USB cable.
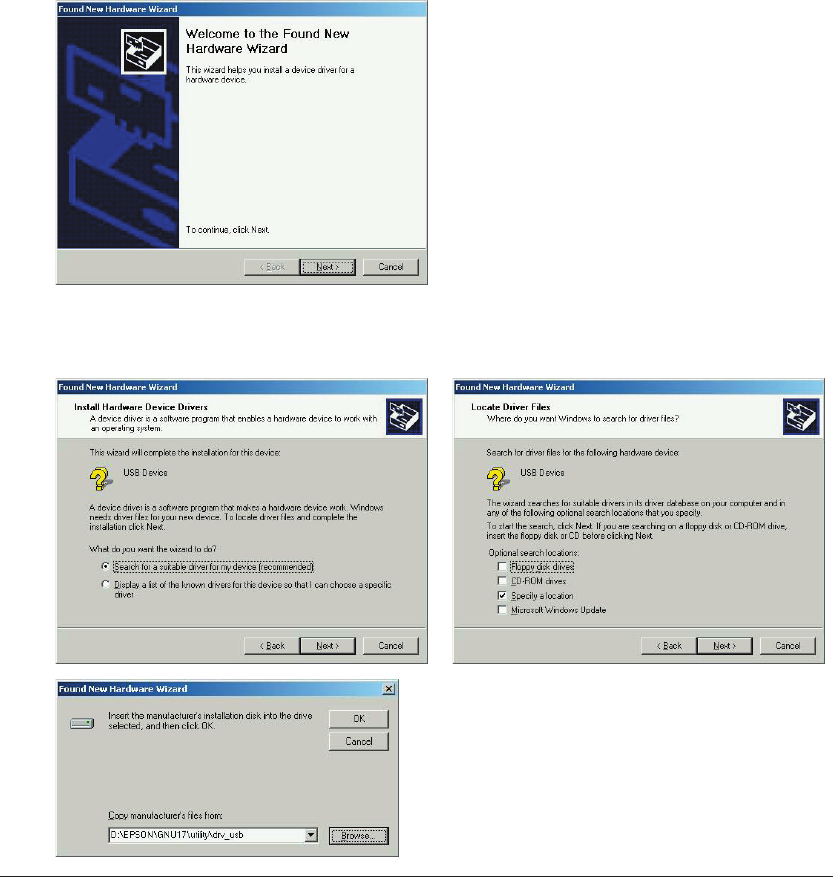
(4) When a screen appears on your PC prompting you to install USB driver, install an appropriate driver. This
operation is required only for the first connection. It is not required for the second connection and after-
ward. For the installation procedure, see the later section Installing USB driver.
(5) Make sure that LED on the ICD board lights in blue
→ green (the target is in debug mode).
(6) Start the debugger on your PC to execute the program. Make sure that LED on the ICD board lights in red (the
target is in normal mode).
For details on the operation of the debugger and debugging commands, see the S5U1C17001C Manual (S1C17
Family C Compiler Package).
Note: Be sure never to disconnect a USB cable between PC and ICD board while the debugger is run-
ning.
Installing the USB driver
(1) When the SVT17801 is connected with the host computer via USB cable, the following screen appears.
(2) Follow the wizard to install USB driver.
For brows directory of the USB driver, specify C:\EPSON\GNU17\utility\drv_usb.
∗ This indicates a directory path where IDE is installed.


