


DXP DVI Pro and DXP HDMI Series • Reference Information 124124
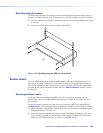
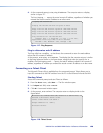
Rack Mounting Procedure
The DXP matrix switchers are housed in rack-mountable metal enclosures with mounting
flanges for standard 19-inch racks. If desired, mount the DXP switcher to a rack as follows:
1. Insert the switcher into the rack, aligning the holes in the mounting flanges with those
in the rack.
2. Secure the switcher to the rack using the supplied bolts.
Figure 115. Rack Mounting the DXP to a 19-inch Rack
Button Labels
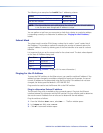
The next page provides strips of blank button labels. If desired, photocopy them or cut
them out of the guide, write button information in each button area as desired, and put
them in the windows for the switcher input or output buttons. You can also create labels
using the Button Label Generator software (see the “Matrix Software” section, starting
on page 70).
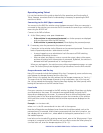
Replacing Button Labels
The button caps are pre-labeled by default, for your convenience. However, you can
replace them with the included additional printed button labels or with labels that you
print yourself.
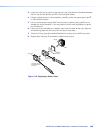
The button assembly consists of a clear lens cap, the button label, and a white diffuser
(see figure 116 on the next page). Remove the button assembly from the DXP as follows:
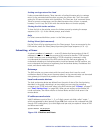
1. Make new labels using either the blanks at the end of this section or the Button Label
Generator software. Cut them out.
2. Remove the button assembly by inserting a small, flat-bladed screwdriver, such as an
Extron Tweeker, between the button base and the diffuser to gently pry the button
assembly off the button plunger, as shown in figure 115, above.