


Operation, cont’d
MVX 128 A VGA Matrix Switchers • Operation
3-30
PRELIMINARY
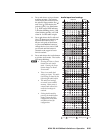
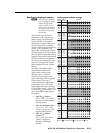
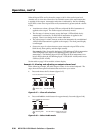
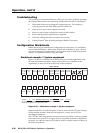
When all input LEDs are lit, the audio output is 100% of the audio input level.
Another way to view the volume level is to think in terms of the attenuation that
is applied to the output. Attenuation reduction is indicated by the lit or blinking
input LEDs: when fewer input LEDs are lit, attenuation is greater (and the volume
is less).
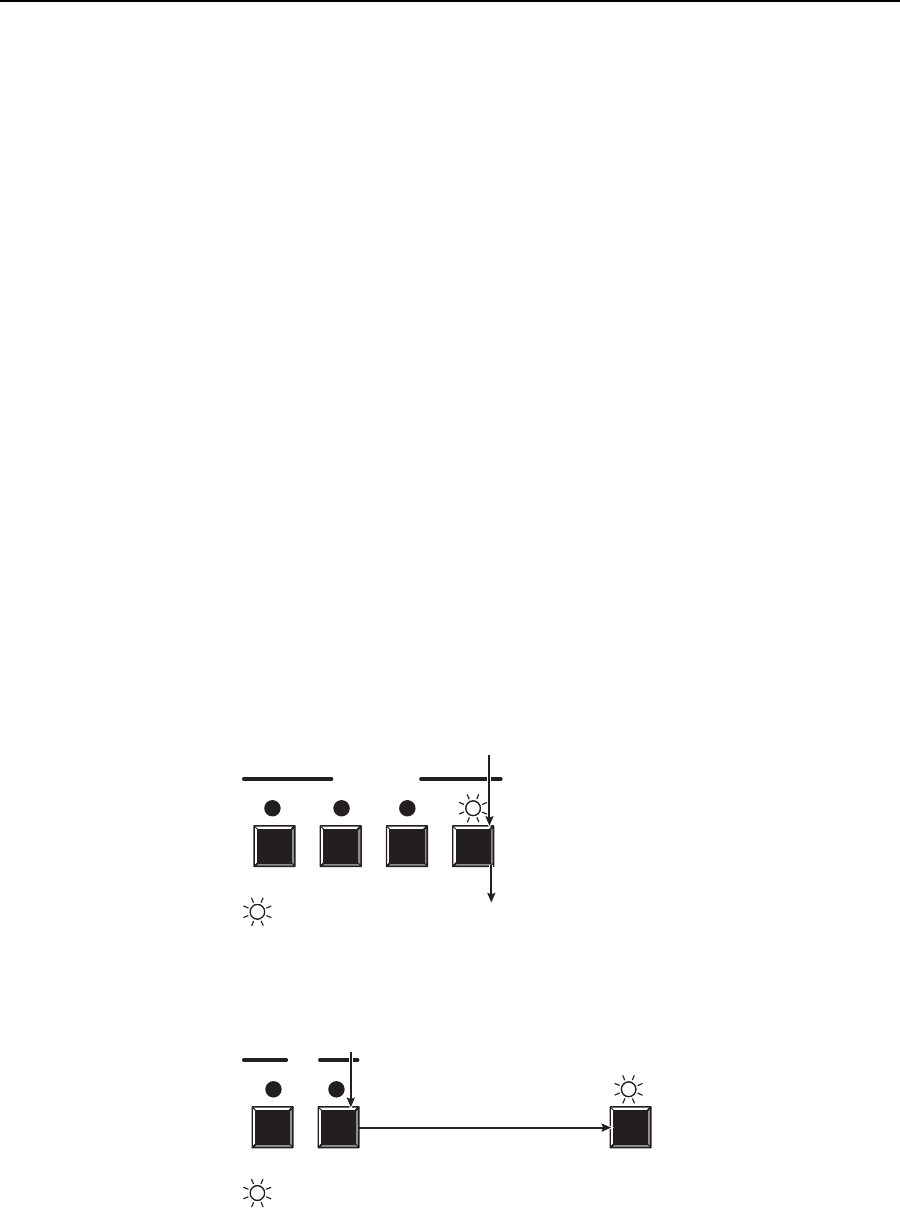
• At minimum volume, all input LEDs are unlit and 98 dB of attenuation is
applied to the output. The audio output is effectively muted.
• The fi rst step of volume increase causes the Input 1 LED to blink slowly.
Attenuation is reduced by 35 dB (63 dB of attenuation is applied to the
output). There is no change in the volume indication.
• The second step of volume increase reduces the attenuation by an additional
1 dB (62 dB of attenuation is applied to the output). The front panel display
is unchanged.
• Successive steps of volume increase cause consecutive input LEDs to fi rst
blink slowly, then quickly, and then light steadily.
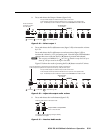
For example: When lit steadily, the Input 3 LED indicates 47 dB of attenuation
when compared to the Input 3 LED blinking quickly (48 dB to 50 dB of
attenuation). The blinking Input 4 LED (45 dB to 46 dB of attenuation) is at
least 2 dB less than the fast blinking Input 3 LED (48 dB – 46 dB) and at most
5 dB less (50 dB – 45 dB).
See the table on page 3-29 to read the volume display.
Example 11: Viewing and adjusting an output volume level
In the following example, the audio output volume is viewed and adjusted. The
steps show the front panel indications that result from your action.
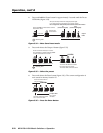
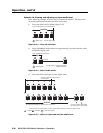
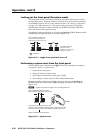
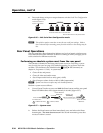
1. Press and release the Esc button (fi gure 3-47).
ENTER PRESET VIEW ESC
CONTROL
Press the Esc button to clear all selections.
The LED blinks once.
= Blink once
1
1
Figure 3-47 — Clear all selections
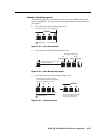
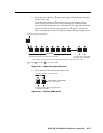
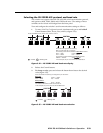
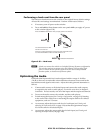
2. Press and hold the Audio button for approximately 2 seconds (fi gure 3-48).
RGBHV AUDIO AUDIO
I/O
The LED blinks to indicate Audio mode.
Release the button.
Press and hold the Audio button.
2 seconds
= Blinking LED
Figure 3-48 — Select Audio mode