


hp fax 1240 series
chapter 3
38
fax
3 Press " or ! to scroll through the speed-dial entries, and then press OK to
select the appropriate entry.
4 When the current fax number appears, press " to erase it.
5 Reenter the fax number.
Tip: To enter a pause in the fax number, press Redial/Pause.
6 Press OK to save the new number.
7 If you need to change the name, press " to erase it, and then reenter the
name using the keypad.
8 Press OK.
9 Press 1 (Yes) to update another entry or 2 (No) to exit.
delete speed-dial entries
Follow these steps to delete an individual or group speed-dial entry.
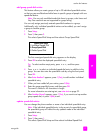
1 Press Setup.
2 Press 2, then press 3.
This selects Speed Dial Setup and then selects Delete Speed Dial.
3 Press ! until the speed-dial entry that you want to delete appears, and
then press OK. You can also enter the speed-dial code by using the front
panel.
Note: Deleting a group speed-dial entry will not delete the individual
speed-dial entries that make up the group.
change fax resolution and lighter/darker settings
You can change the fax resolution and lighter/darker settings of documents that
you are sending.
Note: These settings do not affect copy settings. Copy resolution and copy
contrast are set independently from fax resolution and fax contrast.
This section contains the following topics:
• change the fax resolution on page 38
• change lighter/darker setting on page 39
• set new defaults on page 40
change the fax resolution
The Fax Resolution setting affects the transmission speed and quality of faxed
black-and-white documents. The HP Fax only sends faxes at the highest
resolution supported by the receiving fax machine. You can only change the fax