


basics guide
get creative
33
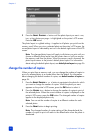
6 Use the arrows on the SELECT PHOTOS button to highlight the frame color
you want to use, then press the OK button to select it.
The printer displays the frame around the selected photo. If you cropped
the photo before adding a frame, the frame automatically shrinks to fit
around the cropped photo.
7 Press the P
RINT button to begin printing.
Note: The frame settings are discarded when the photo is deselected.
change the photo color effect
When you print from a memory card, you can set the printer to change the color
effect of your prints to black and white, sepia, or antique. Photos printed in sepia
print in brown tones and look similar to photos produced in the early 1900s.
Photos printed in antique print in the same brown tones as sepia but with some
pale colors added to give the appearance that they are hand colored.
Note: These effects work best on photos taken in color using your digital
camera.
1 Press the SELECT PHOTOS or button to navigate to the photo for which
you want to change the photo color effect. When the photo you want
appears on the printer’s LCD screen, press the OK button to select it.
2 Press the M
ENU button on the printer’s control panel.
3 Press the S
ELECT PHOTOS button until Enhance image is highlighted on
the printer’s LCD screen. Press the OK button.
4 Press the S
ELECT PHOTOS button until Add color effect is highlighted on
the printer’s LCD screen. Press the OK button.
5 Press the SELECT PHOTOS button until the photo color effect you want to
use is highlighted on the printer’s LCD screen, then press the OK button to
select it. You may choose from the following color effects:
–Black & white
–Sepia
–Antique
– No effect (default)
The printer displays the photo with the selected photo color effect applied.
6 Press the P
RINT button to begin printing.
Note: The photo color effect returns to the default setting (No effect) when
the photo is deselected.