


basics guide
set printer preferences
37
4 Select from the following options:
– Ask if you want the printer to ask you to select a photo layout each time
you insert a memory card into the printer’s memory card slot.
– 1 photo if you want the printer to print one photo per page.
– 2 photos if you want the printer to print two photos per page.
– 4 photos if you want the printer to print four photos per page.
5 With your selection highlighted on the printer’s LCD screen, press the OK
button.
The photo layout is a global setting—it applies to all the photos you print from
the printer’s control panel. When you insert a memory card into the printer’s
memory card slot, the printer sets the photo layout to the default setting.
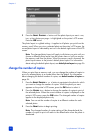
Note: You can choose a different photo layout for the photos on a memory
card at any time by pressing the M
ENU button. With Change layout
highlighted on the printer’s LCD screen, press the OK button. Press the
SELECT PHOTOS button until the desired photo layout is highlighted, then
press the OK button. The changed photo layout will apply to all photos you
print until you remove the memory card from the printer or choose a different
photo layout from the printer menu. For more information, see change the
photo layout on page 29.
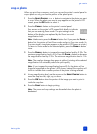
default layout for video action prints
You can set the printer to print 9, 16, or 25 frames from a selected video clip as
a one-page video action print. The printer’s factory default setting for video
action prints is 9 frames. You can change the default setting by following these
steps:
1 Press the M
ENU button on the printer’s control panel.
2 Press the S
ELECT PHOTOS button until Preferences is highlighted on the
printer’s LCD screen. Press the OK button.
3 Press the S
ELECT PHOTOS button until Video print is highlighted on the
printer’s LCD screen. Press the OK button.
4 Press the SELECT PHOTOS button until the number of frames you want to
include in each video action print is highlighted on the printer’s LCD
screen. Press the OK button.
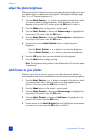
date and time stamp
You can set the printer to print a stamp on the front of your photos that shows
when the photo was taken. You can choose to print the date and time or just the
date. The printer’s factory default setting for the date and time stamp is Off. You
can change the default setting by following these steps:
Note: If you use your computer to modify the photo and then save your
changes, the original date and time information will be lost. Changes that
you make to the photo using the printer’s control panel do not affect the date
and time information.