


basics guide
set printer preferences
39
Exif printing
Your printer supports Exif Print (Exchangeable Image File Format 2.2), an
international open standard that simplifies digital imaging and enhances printed
photos. When you take a photo with a digital camera that supports Exif Print,
information such as exposure time, flash setting, and color saturation is added
to the image file.
You can set the printer to use the Exif Print information it finds in an image file to
automatically adjust and enhance the printed photo. The printer’s factory default
setting for Exif printing is On. You can change the default setting by following
these steps:
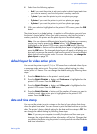
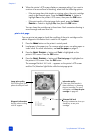
1 Press the M
ENU button on the printer’s control panel.
2 Press the SELECT PHOTOS button until Preferences is highlighted on the
printer’s LCD screen. Press the OK button.
3 Press the SELECT PHOTOS button until Exif printing is highlighted on the
printer’s LCD screen. Press the OK button.
4 Select from the following:
– On if you want the printer to use Exif Print information to enhance your
prints.
– Off if you want the printer to ignore Exif Print information.
5 With your selection highlighted on the printer’s LCD screen, press the OK
button.
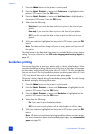
improve contrast
You can set the printer to improve the quality of underexposed photos by
enhancing the contrast in the shadows and highlights. The printer’s factory
default setting for automatically improving contrast is On. You can change the
default setting by following these steps:
1 Press the MENU button on the printer’s control panel.
2 Press the SELECT PHOTOS button until Preferences is highlighted on the
printer’s LCD screen. Press the OK button.
3 Press the SELECT PHOTOS button until Improve contrast is highlighted on
the printer’s LCD screen. Press the OK button.
4 Select from the following:
– On if you want the printer to automatically improve the contrast when it
prints your photos.
– Off if you do not want the printer to adjust the contrast when it prints
your photos.
5 With your selection highlighted on the printer’s LCD screen, press the OK
button.