


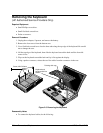

2-16 Removal and Replacement HP OmniBook 7100
2. Remove these additional assemblies:
• Floppy/CD-ROM module or other module (page 2-3).
• Hard disk drive (page 2-5).
• Keyboard (page 2-8).
• Heatsink (page 2-9).
• Display assembly (page 2-11).
• Top case (page 2-14).
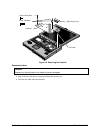
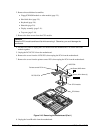
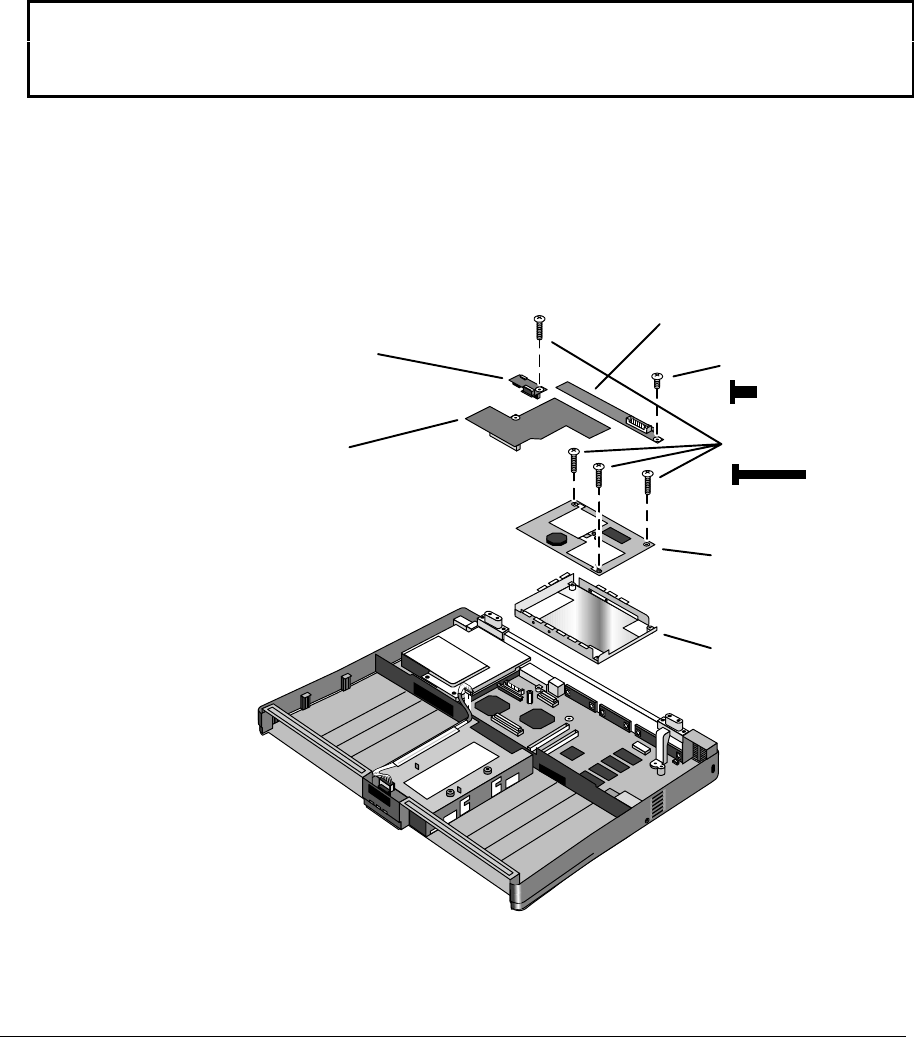
3. Remove the three screws from the CPU module.
Caution
Keep the CPU module and fence flat while removing it. Otherwise, you could damage the
connectors.
4. Lift the CPU fence to unplug the CPU module from the motherboard. Lift out the fence and
module together.
5. Unplug the DC-DC PCA from the motherboard.
6. Remove the screw from the LVDS PCA, then unplug the PCA from the motherboard.
7. Remove the screw from the pointer-control PCA, then unplug the PCA from the motherboard.
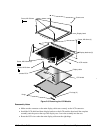
Figure 2-10. Removing the Motherboard (Part 1)
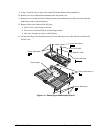
8. Unplug the front-IR cable from the motherboard.
Pointer-control PCA
LVDS PCA
DC-DC PCA
CPU module
CPU fence
Screw, M2×12mm (4)
Screw, M2.5×4mm