HP OmniBook 7100 Removal and Replacement 2-17
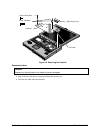
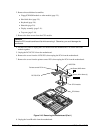
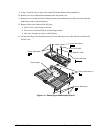
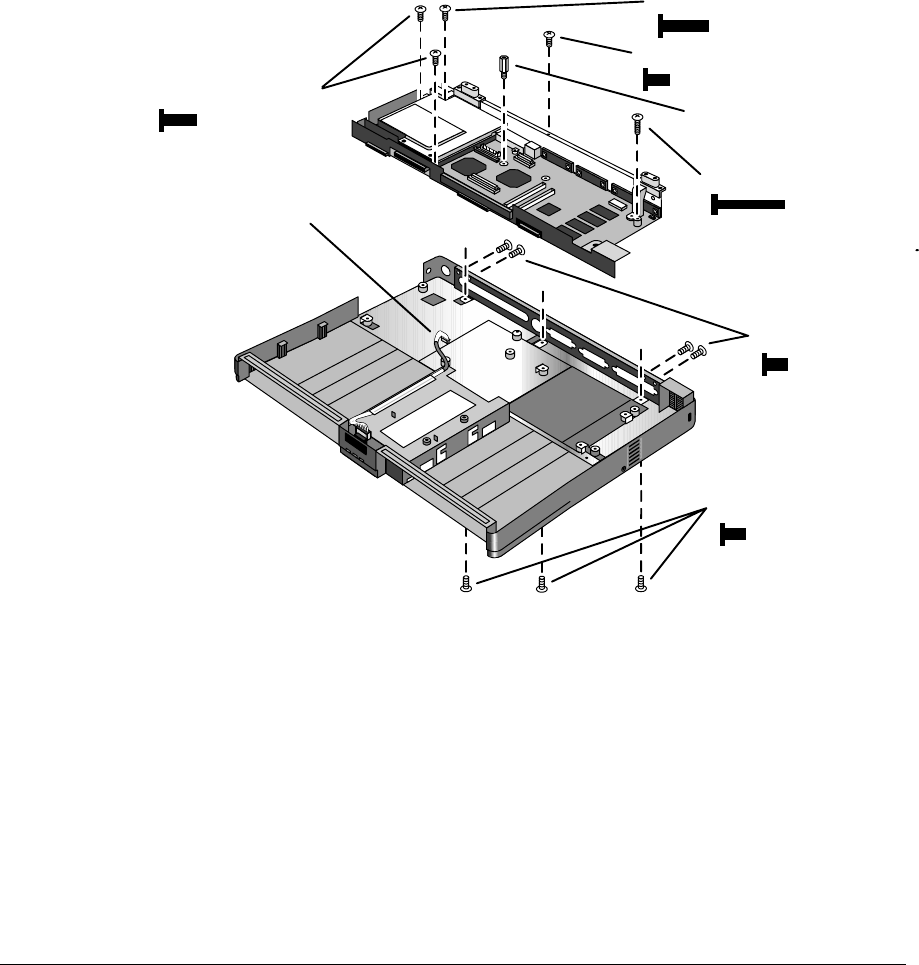
9. Using a 5 mm hex driver, remove the standoff from the middle of the motherboard
10. Remove two screws that hold the motherboard to the bottom case.
11. Remove the screw that holds the left hinge mount to the motherboard, and the screw that holds the
right hinge mount to the motherboard.
12. Remove eight screws that hold the I/O plate:
• Three screws on the bottom of the unit.
• Four screws inside the I/O door near the hinge mounts.
• One screw from the top-center of the I/O plate.
13. Lift the front edge of the motherboard until it clears the bottom case, then slide the board forward
and lift it out.
Figure 2-11. Removing the Motherboard (Part 2)
Screw, M2.5×6mm
Screw, M2.5×4mm (4)
Screw, M2.5×4mm
Standoff, 12mm
Screw, M2.5×4mm
Screw, M2.5×8mm
Screw, M2×12mm
Front-IR cable


