Step 8: Configuring Input Trays
Configure the mode for tray 1 (either First mode or Cassette mode), the
type of media (such as plain paper, letterhead, and transparencies) for
each of the input trays, and the size of the media (such as letter, A4, and
legal) to use tray 1 in Cassette mode. When input trays are configured
correctly, the printer will print based on media type and size and will
automatically use the correct input tray.
For example, tray 2 could contain letterhead; tray 3, plain legal-sized
paper; and tray 4, plain letter-sized paper. If the trays are configured
correctly, when you set up a print job you can choose the media type and
size in the printer driver, and the printer will automatically print from
the correct input tray.
Selecting the Mode for Tray 1
Tray 1 has two modes: First mode and Cassette mode. First mode is the
default mode for tray 1. In First mode, tray 1 functions as a
multipurpose tray. When tray 1 is in First mode, the printer will look
first for media loaded in tray 1. If media is loaded in tray 1, the printer
will print from tray 1.
In Cassette mode, tray 1 functions as a regular input tray. When tray 1 is
in Cassette mode, load media in tray 1 and configure the media type and
size in the printer control panel.
Note When tray 1 is in First mode, specify the media type and size in the
printer driver. If the printer senses that the media in tray 1 is a different
size from the media specified in the printer driver, then the printer will
not feed the media (to prevent damage to the printer).
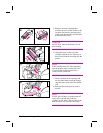
To configure the mode for tray 1
1 Press [Menu] until PAPER HANDLING MENU appears on the printer
control panel display.
2 Press [Item] until TRAY 1 MODE = appears on the display.
3 Press [–[Value]+] until the correct mode appears on the display.
4 Press [Select] to save the selection. An asterisk (*) appears to the right
of the selection.
5 Press [Go] to bring the printer online.
30 Step 8: Configuring Input Trays EN


