


24 Chapter 2 – Basic operations EN
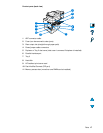
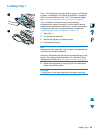
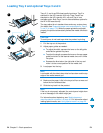
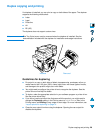
Loading Tray 2 and optional Trays 3 and 4
Trays 2, 3, and 4 are 500-sheet media input trays. Tray 2 is
standard on the HP LaserJet 4100 mfp. Trays 2 and 3 are
standard on the HP LaserJet 4101 mfp, and Tray 4 is an
available option. Both Trays 3 and 4 are available as options for
the HP 4100 LaserJet mfp.
The trays adjust for six standard sizes and many custom sizes
(for details, see “Supported paper sizes and weights for Trays 2,
3, and 4” on page 115). When the paper guides are adjusted
properly, the product automatically senses the media size that is
loaded.
CAUTION
To avoid jams, do not load trays while the product is printing.
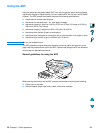
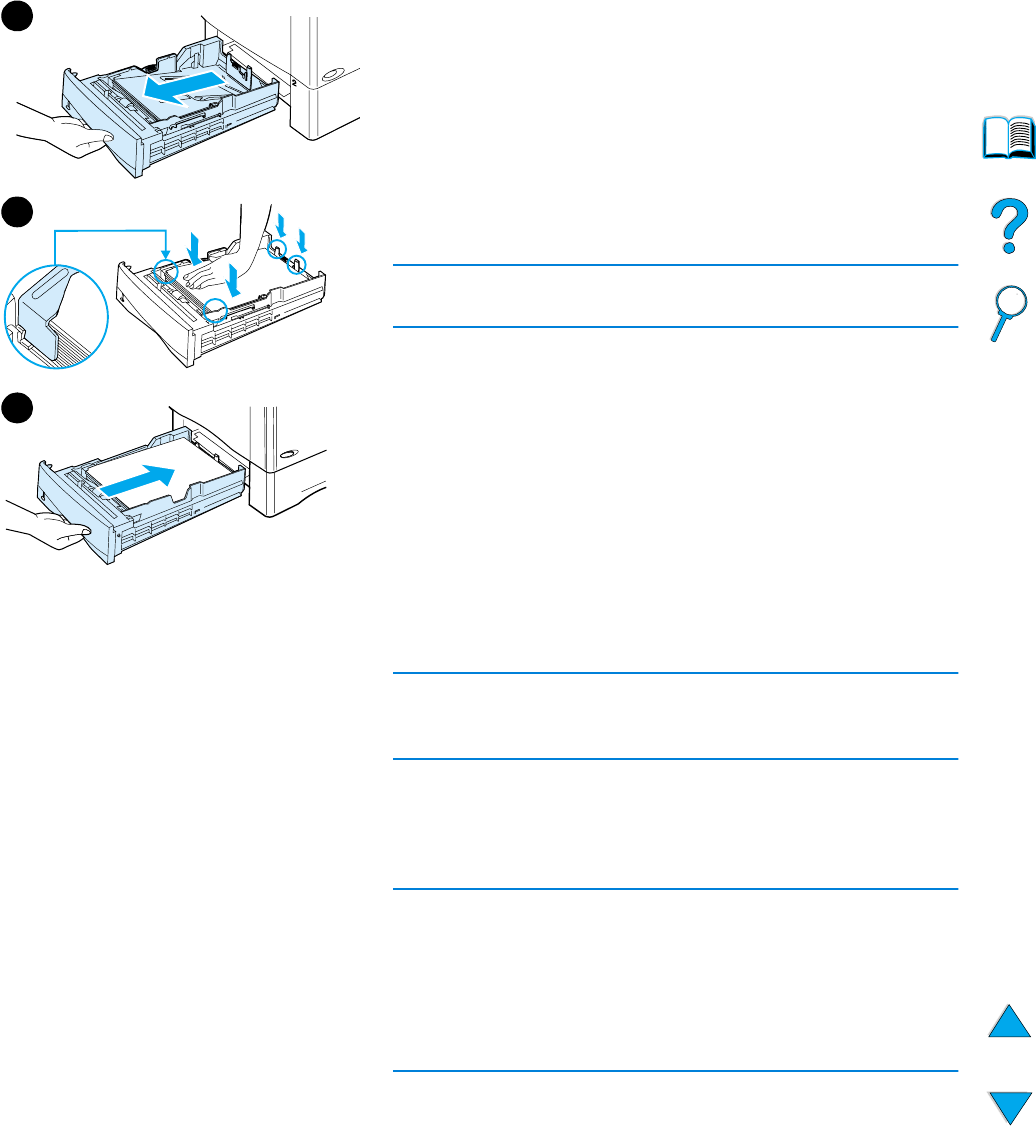
1 Pull the tray out of the product.
2 Adjust paper guides as needed:
● To adjust the width, squeeze the lever on the left guide
and slide the guides into place.
● To adjust the length, squeeze the lever on the rear paper
guide and slide it to the desired media size until it clicks
into place.
● Squeeze the blue tab on the right side of the tray and
move it to the correct position for the media size.
3 Load paper into the tray.
Note
Load media with the side to be printed on face down and the top
edge of the media towards you.
4 Make sure the paper is flat in the tray at all four corners and
below the front and back tabs.
5 Slide the tray back into the product.
Note
If the tray is not properly adjusted, the control panel might show
an error message or the media might jam.
For information about duplexing, see “Media placement
requiring specific orientation” on page 30. For information about
loading special media, see “Using special media” on page 25.
1
4
5