


c9pu239
1
1
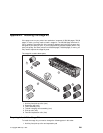
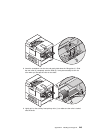
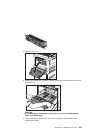
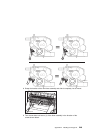
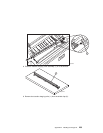
5. Grasp the handles of the fuser assembly (1) and slightly lift up the fuser assembly
and pull it out of the printer (2).
c9pu229
2
1
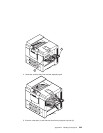
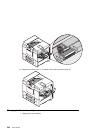
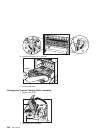
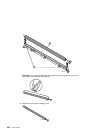
6. Locate the grey envelope levers on the new fuser assembly (1) and the grey
envelope levers on the old fuser assembly (2).
c9pu230
2
1
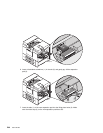
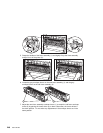
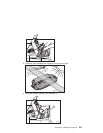
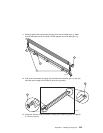
7. Adjust the new fuser assembly envelope levers (1) to match the old fuser envelope
levers (2) by placing the levers either up or down. Most often, the levers will be in
the down position. Do not make any adjustments if the envelope levers are in the
same position.
248 User's Guide