


A-61070 September 1999 8-35
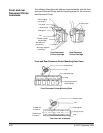
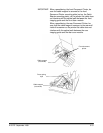
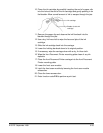
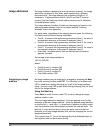
10. Prime the ink cartridge by carefully inserting the end of a paper clip
into the hole at the end of the ink cartridge and gently pushing in on
the bladder. Allow a small amount of ink to escape through the jets.
Ink cartridge
Bladder (inside ink
cartridge
11. Remove the paper clip and observe the ink flow back into the
bladder through the jets.
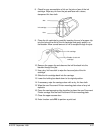
12. Use a dry, lint-free cloth to wipe the face and jets of the ink
cartridge.
13. Slide the ink cartridge back into the carriage.
14. Lower the holding bar back down to its original position.
15. If necessary, wipe the carriage clean with a dry, lint-free cloth.
16. Wipe the front Document Printer mounting plate clean of any ink
deposits.
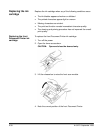
17. Place the front Document Printer carriage into the front Document
Printer mounting plate.
18. Lower the front scan module.
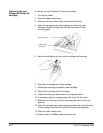
19. Latch the front scan module by lowering the front scan module
release bar.
20. Close the lower access door.
21. Enter function code F45 to perform a print test.