


A-61070 September 1999 2-1
2 Getting Started
The following steps are necessary to prepare the scanner for operation.
Procedures on how to perform these steps are described in this
chapter.
1. Turn on the power to the scanner.
2. Select the language display.
3. Calibrate the scanner.
4. Prepare the documents for scanning.
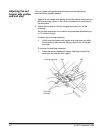
5. Adjust the feed and separator roller gap, if required (semi-automatic
feeder).
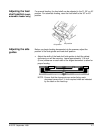
6. Adjust the feed shelf position.
7. Adjust the feed shelf side guides.
8. Adjust the exit hopper side guides and end stop.
9. Select the desired application mode and image level, or the Count
Only function.
10. Start the scanner from the host computer. (This step is not
necessary for the Count Only function.)
11. Press Run.
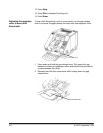
12. Feed the documents into the scanner.
13. Press Stop or End, depending on whether the batch or job has
been completed.
NOTE: After you press Stop, Run can be pressed again and more
documents can be fed into the scanner. After pressing End,
you must enable the scanner from the host computer before
scanning again.
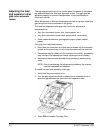
Turning on the
scanner
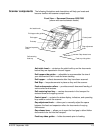
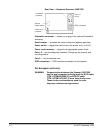
Follow the steps below to turn on the power to the scanner.
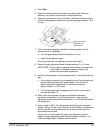
1. Turn on the power switch (located at the rear of the machine).
NOTE: Several initialization messages will appear in the status
display. If you cannot see any messages, try adjusting the
contrast.
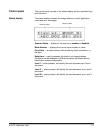
2. Send the Scan command from the host computer to the scanner.
The message
Enabled
will appear in the status display. The current
application mode and next image address will also be displayed.
IMPORTANT:
Do not use the operating keys until the Warming Up
Completed message has been displayed. Entries
made before this message is displayed will not be
recognized by the scanner.