26
4. SPECIFYING THE FILM TYPE
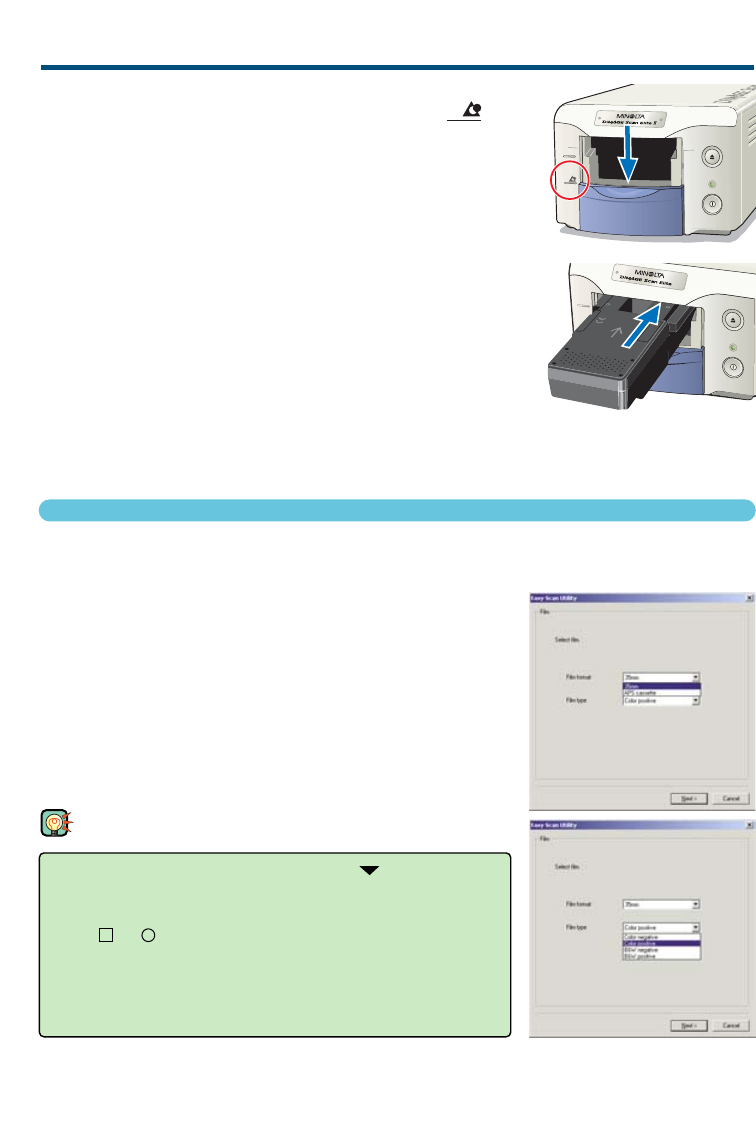
When the Easy Scan Utility is launched, the easy scan wizard appears. Simply follow the instruc-
tions on the scan wizard to scan images.
Select the film format and film type to be scanned
on the pull-down menus. Click “Next >”.
• The following film formats can be chosen:
- 35mm and APS cassette
• The following types of film can be selected:
- Colour negative, colour positive, B&W negative, B&W positive.
• Film for slides is a positive film. Film for prints is a negative film.
TIPS
• With pull-down menus, click on the arrow next to the
menu to display the list. Highlight the item with the mouse
and then click it to make the selection.
• With or boxes, simply click on the box to select the
item.
• To return to a previous screen, click the “<Back” button at the
bottom of the window.
INSERTING THE APS ADAPTOR AD-10 (SOLD SEPARATELY)
1 Open the front door of scanner until the top of
the door lines up with the APS mark – .
2 With the scanner contacts face up, insert the
adaptor into the scanner until it stops.
• The scanner detects the holder and automatically loads the
film from the cassette.
• To eject the holder, push the eject button.The scanner will
automatically rewind the film. Do not remove the adaptor until
the rewind motor has stopped.
• When the scanner is not in use, close the front door.
35mm
35mm
INSERTING THE FILM HOLDER


