


42
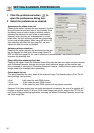
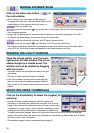
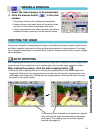
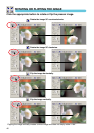
6. MAKING A PRESCAN
Prescanning allows cropping and image processing to be applied to the image before the final scan.
This allows the image data to be optimised at the time of scanning.
Click the prescan tab in the main window to view the prescan window.
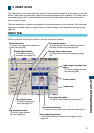
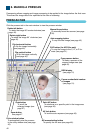
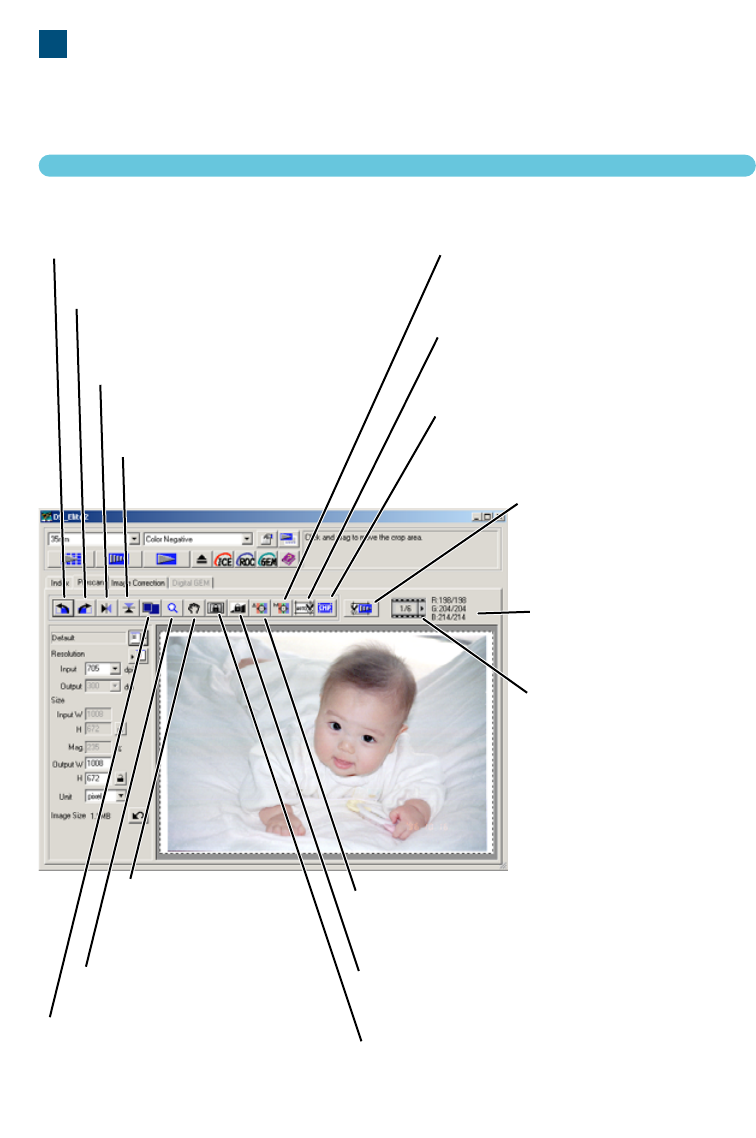
PRESCAN TAB
Rotate-left button
To rotate the image 90˚counterclockwise (see
page 46).
Rotate-right button
To rotate the image 90˚ clockwise (see
page 46).
Flip-horizontal button
To flip the image horizontally
(see page 46).
Flip-vertical button
To flip the image vertically
(see page 46).
Manual-focus button
To manually focus the scanner (see page
50).
Auto-cropping button
To crop the final image (see page 43).
CHP button (for APS film only)
To crop the image to the C, H, or P for-
mats (see page 51).
Crop-prescan button
To make a prescan of the
cropped image area (see
page 45).
RGB display
(see page 51)
Frame number/total number
of images
(see page 51).
Point-AF button
To autofocus on a specific point in the image area
(see page 49).
AE lock button
To lock the auto exposure (see page 48).
AE-area-selection button
To specify the AE area (see page 48).
Grab button
To scroll the
enlarged image. (see
page 47)
Fit-to-window button
To automatically size the prescan
to the utility window size (see page
45).
Zoom button
See page 47.