


– Computer display and external monitor (the Extend desktop function)
– External monitor only
Note: The Windows+P key combination has the same functionality as Fn+F7.
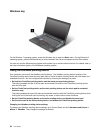
Enabling or disabling the wireless features
• Fn+F5
Enable or disable the built-in wireless networking features.
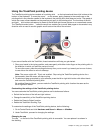
Changing the camera and audio settings
• Fn+F6
– For Windows 7: Open the Communications settings window, in which you can preview your video
image, take a snapshot of your current image, and change the camera and audio settings.
– For Windows 8: Start the Lenovo Settings program. To use the camera or change the camera settings,
click Camera. To adjust the audio settings, click Audio.
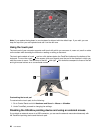
Adjusting the brightness level of the computer display
• Fn+F8: The computer display becomes dimmer.
• Fn+F9: The computer display becomes brighter.
This function changes the brightness level temporarily. To change the default brightness level, change
the settings through the Power Manager program.
Multimedia controls
• Fn+F10: Previous track/scene
• Fn+F11: Play or pause
• Fn+F12: Next track/scene
Other functions
• Fn+Spacebar: Control the keyboard backlight and the ThinkLight light.
– Press once: Turn on the keyboard backlight to low brightness level.
– Press again: Adjust the keyboard backlight to high brightness level.
– Press the third time: Turn off the keyboard backlight and turn on the ThinkLight light.
– Press the fourth time: Turn off the ThinkLight light.
Note: If your computer does not have a backlit keyboard, the Fn+Spacebar combination controls only the
ThinkLight light.
To change the functionality of this combination, see “Cong menu” on page 115
.
• Fn+F3: Lock your computer.
• Fn+B: Have the same function as the Break key on a conventional keyboard.
• Fn+P: Have the same function as the Pause key on a conventional keyboard.
• Fn+S: Have the same function as the SysRq key on a conventional keyboard.
• Fn+K: Have the same function as the ScrLK key on a conventional keyboard.
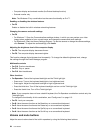
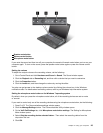
Volume and mute buttons
Adjust the sound volume level of the built-in speakers by using the following three buttons:
24 User Guide