


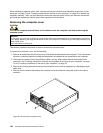
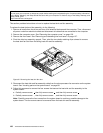
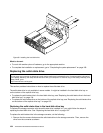
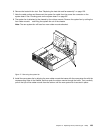
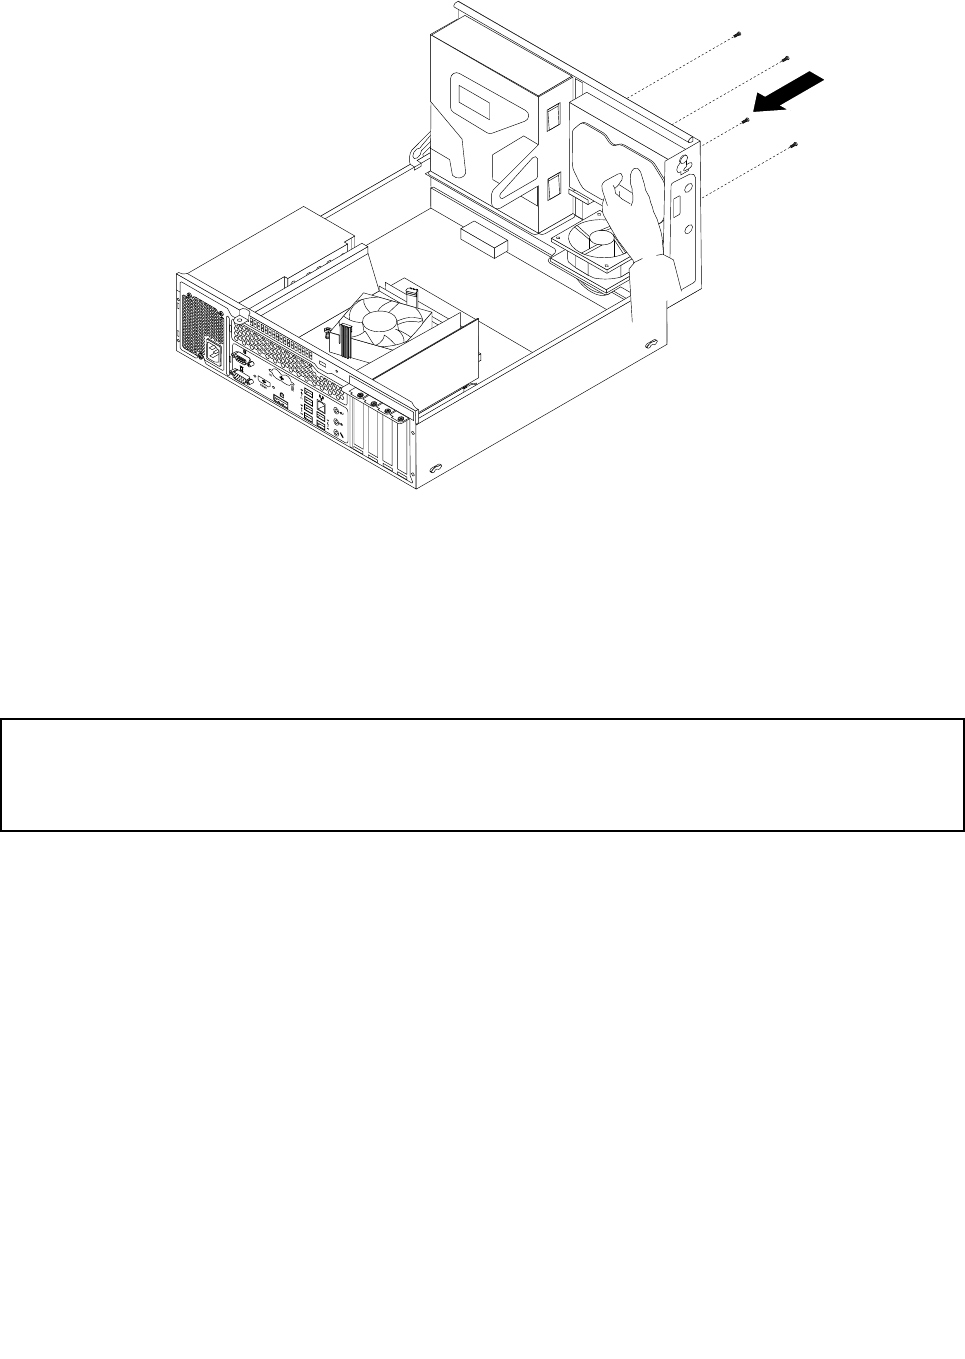
Figure 69. Installing the hard disk drive
What to do next:
• To work with another piece of hardware, go to the appropriate section.
• To complete the installation or replacement, go to “Completing the parts replacement” on page 169.
Replacing the solid-state drive
Attention:
Do not open your computer or attempt any repair before reading and understanding the “Important safety information”
in the Safety, Warranty, and Setup Guide that came with your computer. To obtain a copy of the Safety, Warranty, and
Setup Guide, go to:
http://www.lenovo.com/support
This section provides instructions on how to replace the solid-state drive.
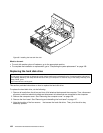
The solid-state drive is only available in some models. It might be installed in the hard disk drive bay or
on the bottom of the optical drive bay.
• To replace the solid-state drive in the hard disk drive bay, see “Replacing the solid-state drive in the hard
disk drive bay” on page 134
.
• To replace the solid-state drive on the bottom of the optical drive bay, see “Replacing the solid-state drive
on the bottom of the optical drive bay” on page 135
.
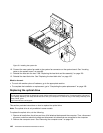
Replacing the solid-state drive in the hard disk drive bay
To replace the storage converter with the solid-state drive installed in it, you might follow the steps of
replacing the hard disk drive. See “Replacing the hard disk drive” on page 132
.
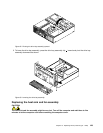
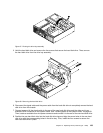
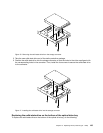
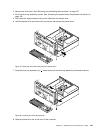
To replace the solid-state drive in the storage converter, do the following:
1. Remove the four screws that secure the solid-state drive to the storage converter. Then, remove the
drive from the converter as shown.
134 ThinkCentre E93 Hardware Maintenance Manual