212 IBM 9077 SP Switch Router: Get Connected to the SP Switch
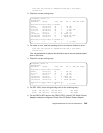
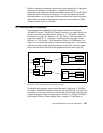
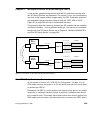
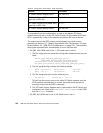
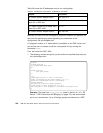
Table 23. Configuration of SP Switch - ATM - SP Switch
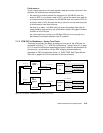
To successfully run this configuration, a route to the distant SP Switch
network has to be set on every SP Switch Router. On the nodes of SP2 and
SP21, respectively, routes to the nodes of the distant SP have to be set.
The media card on the GRF routers should already be up and running
(according to Section 3.7, “Step-by-Step Media Card Configuration” on page
86 and Section 4.2, “ATM OC-3c Configuration” on page 110). The important
settings are repeated here, nevertheless, to be on the safe side:
• On GRF 1600 (ATM card in slot 1, SP Switch card in slot 3):
1. The file /etc/gratm.conf needs the configuration statements for the port
used:
Traffic_Shape name=high_speed_high_quality \
peak=155000 sustain=155000 burst=2048 qos=high
Interface ga010 traffic_shape=high_speed_high_quality
PVC ga010 0/132 proto=ip traffic_shape=high_speed_high_quality
2. The file /etc/grifconfig.conf has the following entries:
gt030 192.168.14.4 255.255.255.0 - mtu 65520
ga010 10.1.1.1 255.255.255.0 - mtu 9180
3. The file /etc/grroute.conf has the following line:
192.168.13.0 255.255.255.0 10.1.1.2
This will set the correct route to the other SP Switch network over the
ATM interface automatically; of course, this route could also be set
manually every time the GRF is rebooted.
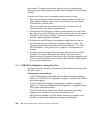
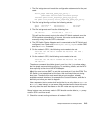
4. The SP Switch Router Adapter card is connected to the SP Switch and
configured, too. Check with
SDRGetObjects switch_responds on the CWS
and use
Eunfence if needed.
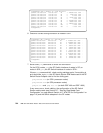
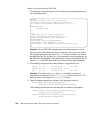
• On GRF 400 (ATM card in slot 2, SP Switch card in slot 1):
Adapter IP Address
SP Switch Router Adapter card 1 192.168.13.4
SP Switch Router ATM media card
(port 00) in GRF 400
10.1.1.2
SP Switch Router ATM media card
(port 00) in GRF 1600
10.1.1.1
SP Switch Router Adapter card 2 192.168.14.4


