Installation and Configuration 76
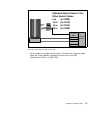
4. Route the Ethernet twisted-pair cable between the SP Switch Router unit
and the Ethernet hub, then connect the cable to the SP Switch Router
control board and the Ethernet hub.
5. Verify that the SP CWS has a connection to this same Ethernet hub. If the
SP CWS Ethernet adapter is configured by the system administrator, then
a
ping test from the SP CWS to the configured SP Switch Router Ethernet
address should be done to test Ethernet connectivity.
Physical installation and minimal configuration are complete at this point.
Review Section 3.4, “Attaching SP Switch Router Cables” on page 79 before
connecting the SP Switch Router Adapter card cables to the SP Switch ports
specified for this configuration.
3.3.2 Installing the PCMCIA Spinning Disk
Your system is shipped with a PCMCIA disk that is required to collect the
system log files. This disk can hold up to 520 MB of data regarding your
model of the SP Switch Router.
You can install the disk any time after the SP Switch Router is powered on
and running. Logging is not enabled until you install the disk and complete
this configuration procedure. Logged messages might be very helpful while
you are configuring media cards. The configuration is done only once to set
up local logs and dumps, and is not affected by software updates or system
reboots. System logs include: gritd.packets, grinchd.log, gr.console,
gr.conferrs, gr.boot and mib2d.log.
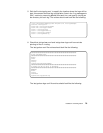
The procedure formats and initializes an external flash (/dev/wdXa), where
the X is normally a 1, denoting the number of the device. You get the actual
number from the
mountf command. We have /dev/wd3a in our example and
this value will be used for the rest of this chapter. The procedure then mounts
the flash temporarily on /mnt and creates subdirectories, symbolic links and a
permanent site file for storing the symbolic links.
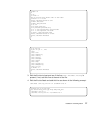
Proceed as follows:
1. Insert the PCMCIA disk into slot A on the SP Switch Router control board
(the width of the disk requires it to be installed in slot A).
2. Log in as root to the SP Switch Router, start the UNIX shell, and execute
the following commands from the shell:


