


5 In the Network Time Protocol section, select Enable NTP.
Note: If you prefer to set the date and time manually, click inside the Manually Set Date & Time box, and then
enter the current date and time.
6 Verify that the time zone is correct.
7 Click Submit.
Sending a fax
Sending a fax using the printer control panel
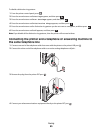
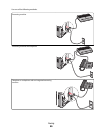
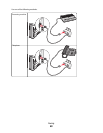
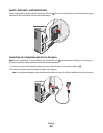
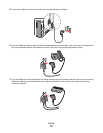
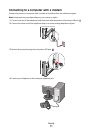
1 Load an original document faceup, short edge first into the ADF or facedown on the scanner glass.
Note: Do not load postcards, photos, small items, transparencies, photo paper, or thin media (such as magazine
clippings) into the ADF. Place these items on the scanner glass.
2 If you are loading a document into the ADF, then adjust the paper guides.
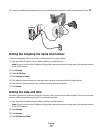
3 From the printer control panel, press the Fax button.
4 Enter the fax number, and then press .
Notes:
• To cause a two- or three-second pause in a fax number, press the Redial/Pause button. The dial pause appears
as a comma on the “Fax to” line. Use this feature if you need to dial an outside line first.
• Press to move the cursor to the left and delete a number.
• To use a fax shortcut, press , and then press the arrow buttons until the fax shortcut you want appears.
Press
.
5 Press 1 to enter another fax number, or press 2 to end fax number entry.
6 Press .
Sending a fax using the computer
Faxing from a computer lets you send electronic documents without leaving your desk. This gives you the flexibility
of faxing documents directly from software programs.
For Windows users
1 With a file open, click File Print.
2 Click Properties, Preferences, Options, or Setup.
3 Click the Other Options tab, and then click Fax.
4 On the Fax screen, type the name and number of the fax recipient.
5 Click OK, and then click OK again.
6 Click Send.
Faxing
73