Using the System
46
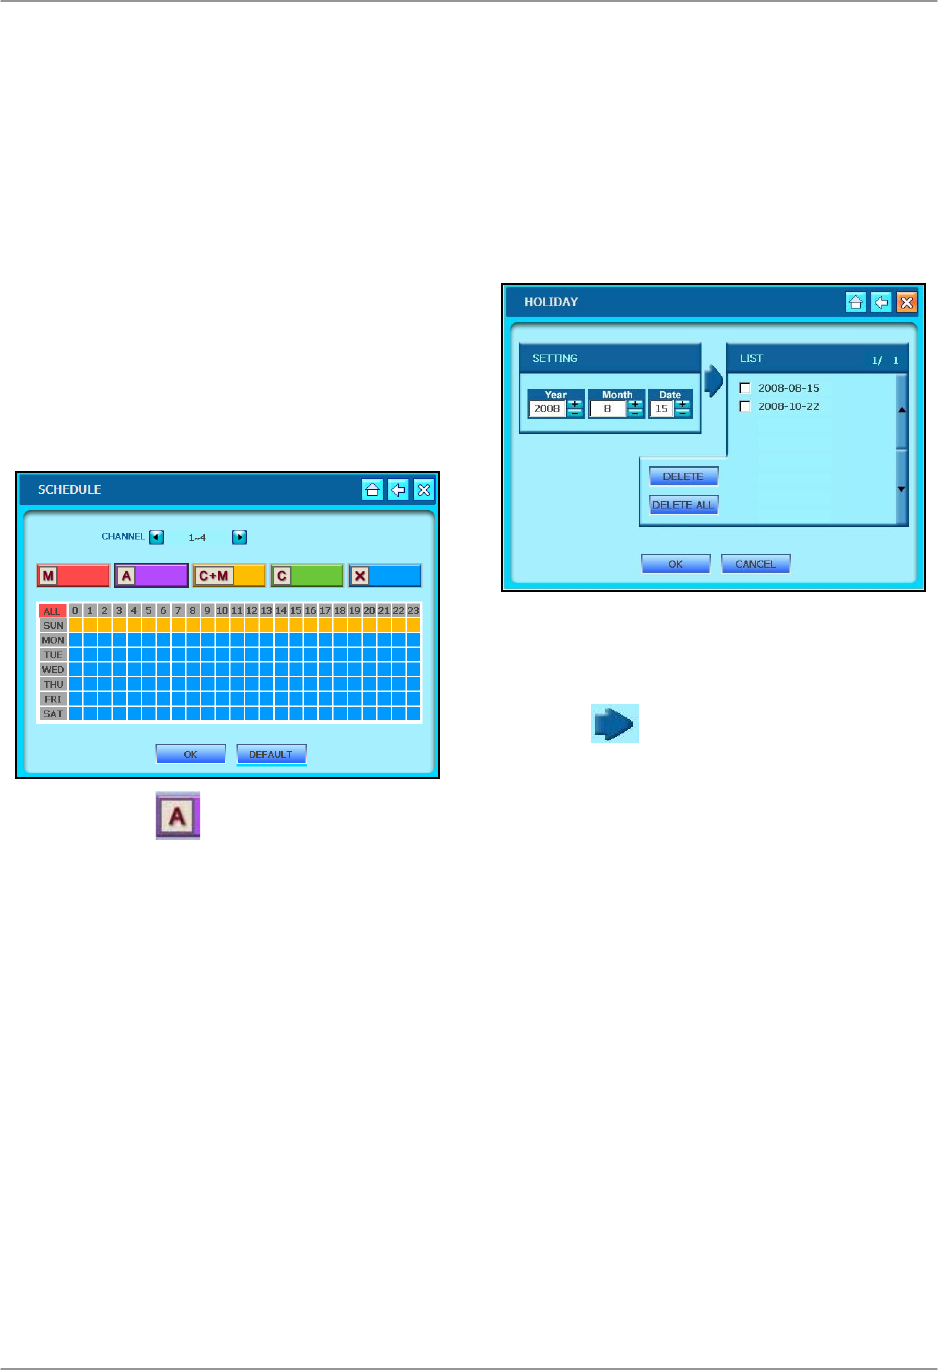
Schedule (cont’d)
To set a recording schedule:
Mouse:
1. Click the ◄► to select a group of
channels (number varies depending on
your system).
2. Click one of the five recording modes
(M, A, C+M, C, X).
3. Click one of the tiles in the table
according to the day and hour(s) you
want to apply the record mode. For
example, if you wanted Alarm
recording from midnight to 6 AM,
Monday-Friday:
i. Click .
ii. Click and drag across the table
from tile “MON-0” to tile “FRI-5.”
The selected area turns purple to
indicate Alarm recording is
enabled from 12 AM to 6 AM,
Monday-Friday.
4. Repeat steps i-ii for whichever
recording mode you want to schedule.
5. Click OK to save your settings or click
DEFAULT to restore factory defaults.
Note: Sunday schedule is used for Holiday
record setting. See NEXT SECTION.
Holiday
Set the system to record when you are
away on holiday or for national holidays.
Note: Holiday records according to the
Sunday recording schedule. Whatever
recording mode(s) you have scheduled for
Sunday will be used for dates in your
Holiday list. See PREVIOUS SECTION.
To set Holiday Recording:
5. Under SETTING, enter the date you
want to include in the Holiday list.
6. Click
to add the date to the list.
7. Click OK to save your settings or
CANCEL to quit without saving.
To delete dates from Holiday Recording:
1. Under LIST, check the box beside the
specific date you want to delete.
2. Click DELETE.
OR
1. Click DELETE ALL without checking
any boxes to delete all dates from the
Holiday Recording list.
2. Click OK to save your settings or click
CANCEL to quit without saving.


