Chapter 6: Logging Onto a Magnum Router
___________________________________________________________________
6-1
Chapter 6: Logging Onto a Magnum Router
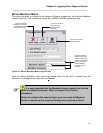
After the initial installation of the Magnum Router Manager software and its setup, the main
login screen is displayed. This screen is only displayed when the Magnum Router Manager is
first started or when the Login to a Magnum Router menu item is selected from the Access
menu.
This chapter covers the different methods of logging onto a Magnum Router and how to connect
equipment to allow the Magnum Router Manager to logon to the Magnum Router.
Connecting to a Magnum Router
As will be discussed in more detail later in this chapter, there are 4 methods of logging onto a
Magnum Router. Each method has a different cabling requirement – each is covered in this
section.
Console Cabling
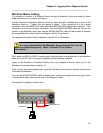
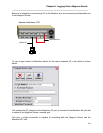
To create a console login, first attach a straight-thru cable from a PC’s communications port to
the Magnum Router’s console port. Included with the Magnum Router is a DB-9 to DB-25
console cable labeled M5000C/CP. If the interface on the PC’s interface is a DB-25 and NOT a
DB-9, substitute the appropriate straight-thru cable.
Telnet Cabling
A telnet login requires that there be an Ethernet cable attached to the Magnum Router’s E1 (or
Ethernet) port and that the PC can gain IP access to the Magnum Router.
Attach the supplied Ethernet cable (M5000C/CAT5E) Category-5 (or equivalent) cable from the
E1 port to an Ethernet hub or switch. If the PC is to be directly attached to the Magnum Router,
then an Ethernet crossover cable will be required.
A Successful connection can be visually verified, as the green link light on the Magnum Router’s
Ethernet port will be lit.
Before attempting to logon to the Magnum Router, verify that the PC that is running the
Magnum Router Manager can access the Magnum Router by performing a PING command.
The default IP address of the 10/100 Base-T E1 port is 10.1.100.250 with a subnet mask of
255.255.255.0.


