MEMORY UPGRADES
4/3
Caution
If you are unfamiliar with the recommended anti-static precautions and/or the
process of removing the system unit cover, refer to Appendix A, “The System
Unit”.
3. Remove carefully the floppy disk drive module which restricts
access to the SIMM sockets (first identifying the way all cables
are fitted) by disconnecting the cables, loosening the screws and
lifting out.
4. Compare the current configuration of SIMMs with the
configuration for the memory upgrade you intend to install. If
necessary, remove the existing SIMMs, before going on to install
the new SIMMs.
To install a SIMM
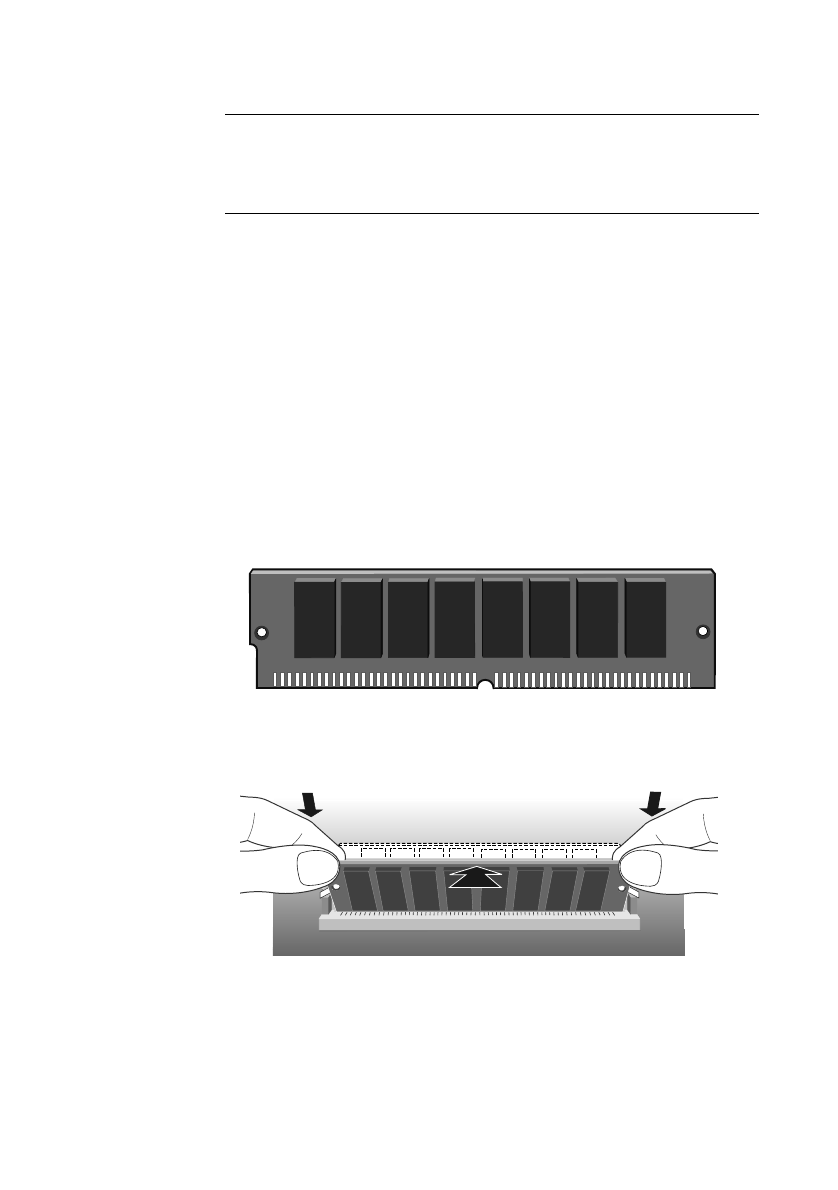
1. Take the SIMM out of its anti-static packaging. Hold it by its
edges and avoid touching the metal contacts.
Note that the SIMM is not symmetrical. There are small notches in
one end and also slightly off-centre along the connection edge, as
shown in the picture above, it will only fit into the socket one way.
2. Place the SIMM in the socket at a 15
o
angle to the vertical.


