


97
7. User Supportware
Using on Mac OS
Step 1: Install Image Express Utility Lite for Mac OS on the computer
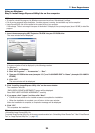
1. InserttheaccompanyingNECProjectorCD-ROMinyourMacCD-ROMdrive.
TheCD-ROMiconwillbedisplayedonthedesktop.
2. Double-clicktheCD-ROMicon.
The CD-ROM window will be displayed.
3. Double-clickthe“MacOSX”folder.
4. Double-click“ImageExpressUtilityLite.dmg”.
The“ImageExpressUtilityLite”windowwillbedisplayed.
5. Draganddropthe“ImageExpressUtilityLite”foldertoyourApplicationsfolderinMacOS.
Step 2: Connect the projector to a LAN
ConnecttheprojectortotheLANbyfollowingtheinstructionsin“ConnectingtoaWiredLAN”(→page85)and“Con-
nectingtoaWirelessLAN(Optional:NP05LMseries)”(→page86).
Step 3: Start Image Express Utility Lite for Mac OS
1. Open your Applications folder in Mac OS.
2. Double-clickthe“ImageExpressUtilityLite”folder.
3. Double-clickthe“ImageExpressUtilityLite”icon.
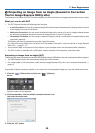
WhenImageExpressUtilityLiteforMacOSstarts,theselectwindowfordestinationwillbedisplayed.
• Atthersttimeofstartup,“ENDUSERLICENSEAGREEMENT”screenwillbedisplayedbeforetheselect
window for destination is displayed.
Read“ENDUSERLICENSEAGREEMENT”andselect“Iacceptthetermsinthelicenseagreement”,andclick
“OK”.
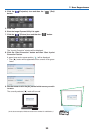
4. Selectaprojectortobeconnected,andthenclick“Connect”.
Yourdesktopscreenwillbedisplayedontheprojector.
TIP:
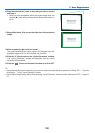
ViewingtheHelpofImageExpressUtilityLiteforMacOS
• Fromthemenubar,click“Help”→“ImageExpressUtilityLiteHelp”whileImageExpressUtilityisrunning.
The Help screen will be displayed