


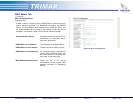
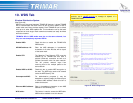

7. SSID Admin Tab
SSID CONTROLS
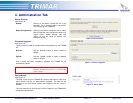
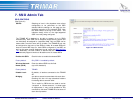
(See Figure 21)
SSID #: Selecting an item in this dropdown menu allows
configuration to be performed on the SSID
selected. All the settings on this page are the
exclusive properties of the selected SSID. Note
the SSID number at the top of the frame – this
indicates exactly which of the eight-supported
SSID is currently being configured.
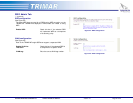
The TRIMAR AP is designed to be able to support up to 8 SSIDs
simultaneously. Each SSID can be assigned unique security policies and
can individually be assigned to a separate VLAN. Only one SSID can be
made visible; the other seven will be invisible. The TRIMAR AP can also
be configured so that none of the SSIDs is visible. All created SSIDs will
share the same WEP keys (for those SSIDs configured to use WEP) as
well as the same channel assignment as set under the
Basic Wireless
Tab. Additionally, the total number of stations that the TRIMAR AP can
simultaneously support remains at 48 stations over all created SSIDs.
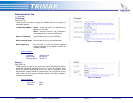
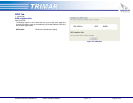
Enable this SSID: Check this box to enable the selected SSID.
Factory default: Only SSID 1 is enabled by default.
Wireless Network: Enter the desired SSID into this field.
Name (SSID) (up to 32 characters)
Factory default: TRIMAR
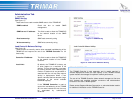
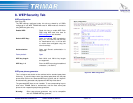
Disable Local: By default, all stations connected to the TRIMAR
AP
Bridging are able to see and communicate with each other.
Checking this box will stop associated stations
from being able to see each other.
This is useful for SSIDs that are used to service
“hot-spots” or “Guests accounts”. In these types
of deployments, it may not be desirable for PCs
connected to the same TRIMAR AP to be aware of
each others’ presence.
Figure 21: SSID controls
PEGASUS WIRELESS CORPORATION TRIMAR TECHNICAL MANUAL Version 1.0 Page 19 of 32