


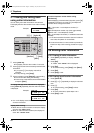

3. Telephone
28
3.7 Viewing and calling back
using caller information
You can easily view caller information and call back.
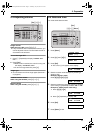
The display will show the number of new calls in standby
mode.
Example: 10 NEW CALLS
10:59AM
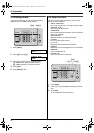
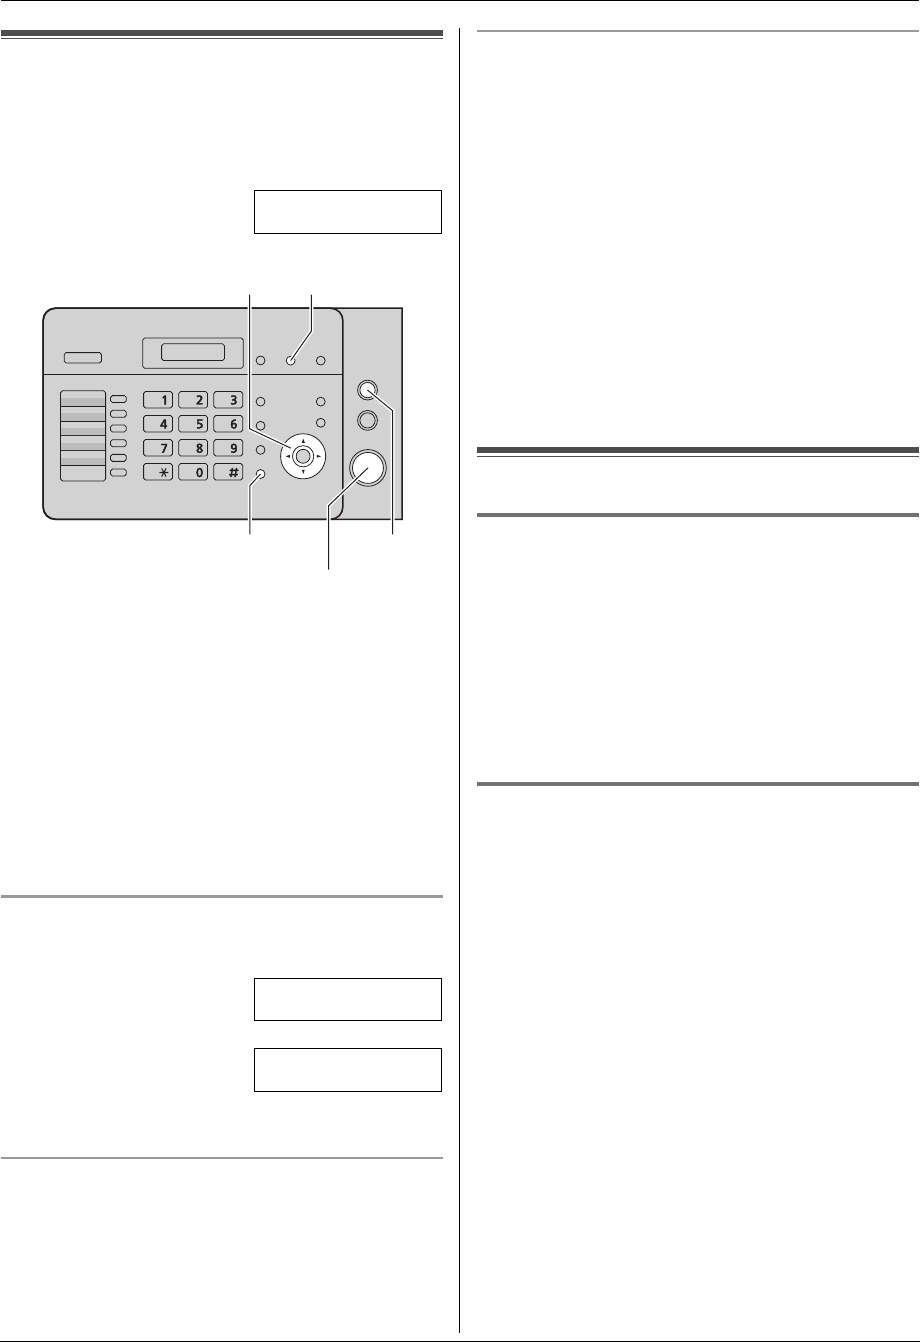
1 Press {Caller ID}.
L The display will show the number of new calls.
2 Press {A} to search from the recently received caller
information.
L If you press {B}, the display order will be
reversed.
L To stop viewing, press {Stop}.
3 Lift the handset or press {Monitor} to start dialing.
L The unit will start dialing automatically.
L To send a fax, insert the document FACE DOWN
and press {Start}.
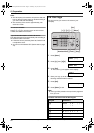
To change the way caller information is displayed
Press {Caller ID} repeatedly after the caller information
is displayed.
Example: SAM LEE
11:20AM Jul. 20,
b
1-134-567-8901
11:20AM Jul. 20,
L A Q on the display means the item has already been
viewed or answered.
Display while viewing
L When the unit could not receive a name, the display
will show “NO NAME RCVD”.
L When no calls have been received, the display will
show “NO CALLER DATA”.
To edit a telephone number before calling
back/storing
While displaying a desired caller information, press {*}
repeatedly. Each time you press {*}, the telephone
number will be changed as follows:
A 1 – Area code – Local telephone number (“1”
added)
*1
B Local telephone number only (area code omitted)
C Area code – Local telephone number
*1
D 1 – Local telephone number (“1” added and area code
omitted)
*1 If the received caller information does not include an
area code, this pattern is not available.
L To store the number in one-touch dial or phonebook,
follow from step 3 of the storing procedure on page
29.
3.8 Erasing caller information
3.8.1 Erasing all caller information
1
Press {Menu} repeatedly to display “CALLER
SETUP”.
2 Press {Set}.
L “CALL LIST ERASE” will be displayed.
3 Press {Set}.
L To cancel erasing, press {Stop}, then {Menu}.
4 Press {Set}.
5 Press {Stop} to exit.
3.8.2 Erasing specific caller information
1
Press {Caller ID}.
2 Press {A} or {B} repeatedly to display the desired
item.
3 Press {<}.
L To cancel erasing, press {Stop} 2 times.
4 Press {Set}.
L To erase other items, repeat steps 2 to 4.
5 Press {Stop} to exit.
{A}{B}
{Monitor} {Stop}
{Caller ID}
{Start}
FL421-PNQX3022ZA-OI-en.book Page 28 Thursday, July 29, 2010 9:35 AM