


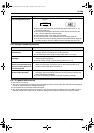
8. Help
55
For assistance, please visit http://www.panasonic.com/help
L If you replace only the toner cartridge, tap on the
used toner cartridge several times to allow the
remaining toner to fall into the drum unit before
removing.
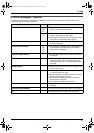
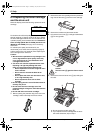
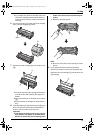
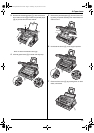
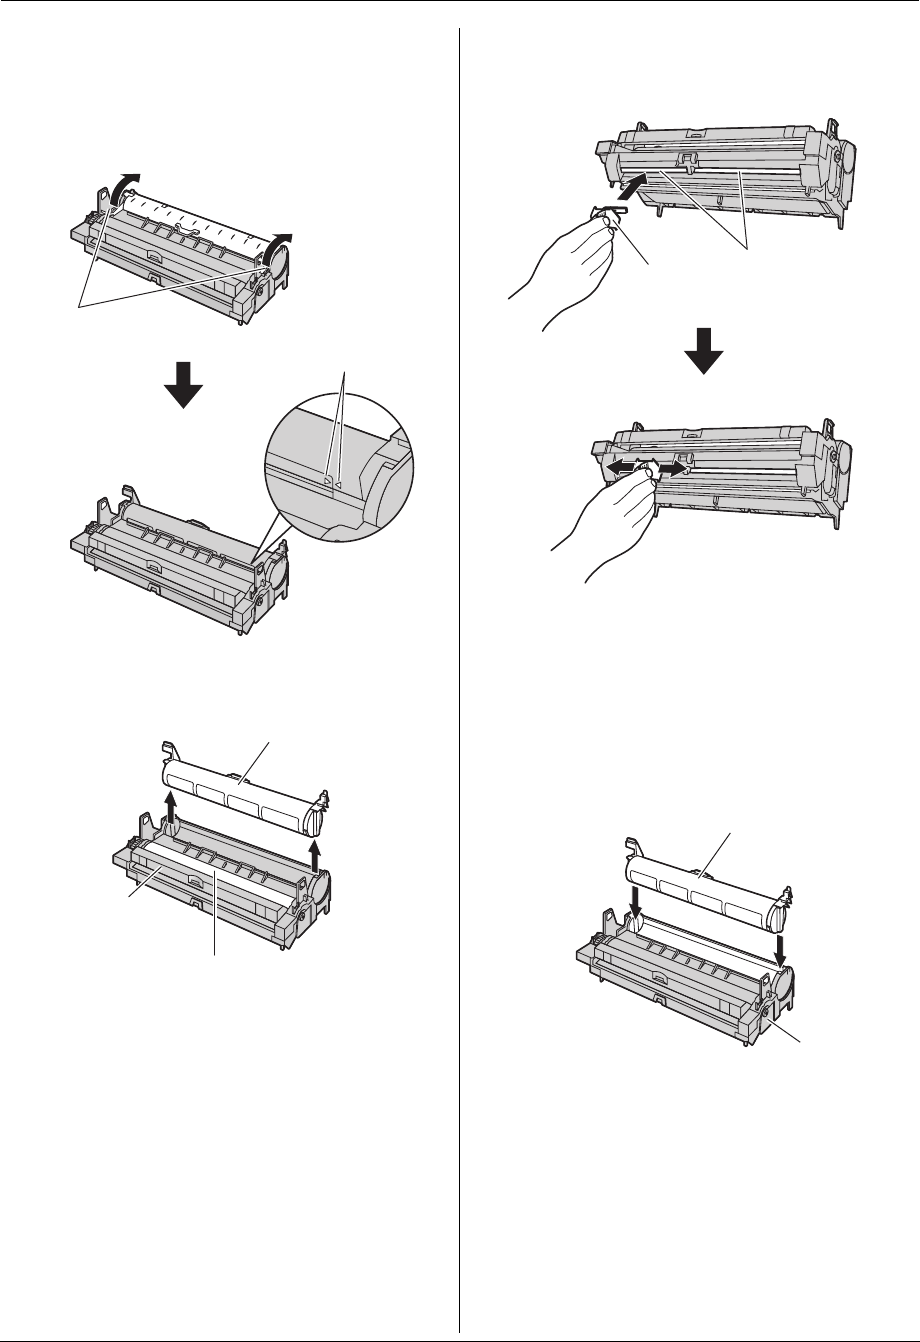
6 Turn the two levers (1) on the used toner cartridge
firmly, until the triangles (2) match.
7 Remove the used cartridge (1) from the drum unit
(2).
L The toner may stick to the cartridge and the drum
unit. Be careful when handling. See page 5 for
details.
L Do not drop the toner on the black drum surface
(3).
L Put the used toner cartridge into the protection
bag.
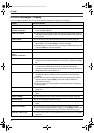
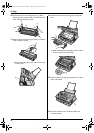
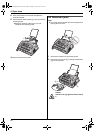
8 Insert the cleaner (1) fully into the groove (2) of the
drum unit and move it from side to side at least 3
times to clean the inside of the drum unit.
Important:
L If the groove of the drum unit is dirty, lines or
dirty patterns may appear on printed sheets.
Be sure to remove any toner remaining on the
inside of the drum unit to maintain the print
quality.
L Repeat for the other groove.
Note:
L Be sure to clean all the way to the edge of each
groove.
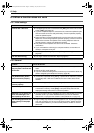
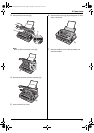
9 If you replace the drum unit at the same time,
remove the new drum unit from the protection bag.
Place the new toner cartridge (1) into the drum unit
(2) vertically.
1
2
1
2
3
1
2
1
2
FL421-PNQX3022ZA-OI-en.book Page 55 Thursday, July 29, 2010 9:35 AM