


4. Scanner
34
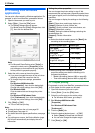
3 Press {V} or {^} repeatedly to select “PC”. i
{Set}
4 For USB connection:
Press {V} or {^} repeatedly to select “USB Host”.
i {Set}
For LAN connection:
Press {V} or {^} repeatedly to select the computer to
which you want to send the scanned image. i
{Set}
5 Press {V} or {^} repeatedly to select “Email”. i
{Set}
6 If necessary, change the scanning settings. Press
{V} or {^} repeatedly to select the desired setting,
then press {<} or {>}. i {Set}
7 {Start}
L The email software will automatically start and
the scanned image will be attached to a new
email message.
Note:
L To select the default email software, see page 29.
L To stop scanning, see page 85.
L You can save the images in TIFF, JPEG or PDF
formats.
L You can set the desired scan mode for scanning to
your computer beforehand (feature #493 on page
77).
L The scanned image will be automatically saved in the
folder selected in the [Settings] window (page 29).
4.1.4 Scan to OCR
With OCR software, you can convert an image into text
data that can be edited with word processing software.
Readiris OCR software can be installed when installing
Multi-Function Station.
1 Set the original (page 21).
2 {Scan}
3 Press {V} or {^} repeatedly to select “PC”. i
{Set}
4 For USB connection:
Press {V} or {^} repeatedly to select “USB Host”.
i {Set}
For LAN connection:
Press {V} or {^} repeatedly to select the computer to
which you want to send the scanned image. i
{Set}
5 Press {V} or {^} repeatedly to select “OCR”. i
{Set}
6 If necessary, change the scanning settings. Press
{V} or {^} repeatedly to select the desired setting,
then press {<} or {>}. i {Set}
7 {Start}
L The scanned image will be displayed in the OCR
window after scanning.
Note:
L To stop scanning, see page 85.
L You can save the images in TIFF, JPEG or BMP
formats.
L For detailed instructions about OCR, select [Help].
L You can set the desired scan mode for scanning to
your computer beforehand (feature #493 on page
77).
L The scanned image will be automatically saved in the
folder selected in the [Settings] window (page 29).
4.1.5 Scan to email address (LAN
connection only)
You can send the scanned image as an attachment
without using email software.
Important:
L Program the email server, SMTP server settings
(page 77) and the email destinations (page 77)
beforehand.
1 Set the original (page 21).
2 {Scan}
3 Press {V} or {^} repeatedly to select “Email
Address”. i {Set}
4 Enter the destination email address.
Using navigator key:
Press {V}, {^}, {<} or {>} repeatedly to select the
desired destination.
Using dial keypad:
1. Press {V} or {^} repeatedly to select
“Temporary Address”. i {Set}
2. Enter the email address using the dial keypad
(page 83).
5 {Set}
6 If necessary, change the scanning settings. Press
{V} or {^} repeatedly to select the desired setting,
then press {<} or {>}. i {Set}
7 {Start}
L The scanned image will be sent as an email
attachment directly from this unit.
Note:
L You can search for an email address by initial.
Example: “Lisa”
1. Perform steps 1 to 3 on “4.1.5 Scan to email
address (LAN connection only)”, page 34.
2. Press {5} repeatedly to display any name with
the initial “L” (see page 83 for character entry).
L To search for symbols, press {*}.
3. Press {V}, {^}, {<} or {>} repeatedly to select
“Lisa”.
L To stop the search, press {Stop} .
L To stop scanning, see page 85.
L You can save the images in TIFF, JPEG or PDF
formats.