


Chapter 4 Settings — [PROJECTOR SETUP] menu
122 - ENGLISH
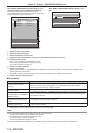
2) Press the <ENTER> button.
f The [DATE AND TIME] screen is displayed.
3) Press as to select [ADJUST CLOCK].
4) Press the <ENTER> button.
f The [ADJUST CLOCK] screen is displayed.
5) Press as to select [NTP SYNCHRONIZATION], and press qw to change the setting to [ON].
6) Press as to select [APPLY], and press the <ENTER> button.
f The setting of the date and time will be completed.
Note
f To set the date and time automatically, the projector must be connected to the network.
f If synchronization with the NTP server fails just after [NTP SYNCHRONIZATION] is turned [ON], or if [NTP SYNCHRONIZATION] is turned
[ON] while the NTP server is not set, [NTP SYNCHRONIZATION] will return to [OFF].
f Access the projector via a web browser to set the NTP server. Refer to “[Adjust clock] page” (x page 144) for details.
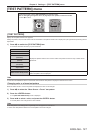
[LENS CALIBRATION]
Automatically set the lens shift limit values and home position for the projector.
1) Press as to select [LENS CALIBRATION].
2) Press the <ENTER> button.
f The conrmation screen is displayed.
3) Press qw to select [OK], and press the <ENTER> button.
f To cancel, select [CANCEL].
f The lens moves up, down, left, and right to automatically set the lens shift limit values and home position.
f The lens stops to complete the calibration.
Note
f [PROGRESS] is displayed on the menu during lens calibration. Cannot cancel mid-operation.
f When lens calibration executes correctly, [COMPLETE] is displayed and [INCOMPLETE] is displayed when it does not execute correctly.
f Pressing the <FOCUS> button on the remote control for at least three seconds will also display the conrmation screen for lens calibration
execution.
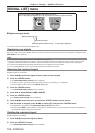
[LENS MEMORY]
Save and load the focus position, shift position, and zoom position of an adjusted lens.
Saving lens position
1) Press as to select [LENS MEMORY].
2) Press the <ENTER> button.
3) Press as to select [LENS MEMORY SAVE].
4) Press the <ENTER> button.
f The [LENS MEMORY SAVE] screen is displayed.
5) Press as to select the item to save, and press the <ENTER> button.
6) When the confirmation screen is displayed, press qw to select [OK], and press the <ENTER> button.
f The [LENS MEMORY NAME INPUT] screen is displayed.
7) Press asqw to select the text, and press the <ENTER> button to enter the text.
8) After the name is input, press asqw to select [OK], and press the <ENTER> button.
f The registration completes and returns to the [LENS MEMORY SAVE] screen.
f If you press asqw to select [CANCEL] and then press the <ENTER> button, the lens memory will not be saved.
f If you press asqw to select [DEFAULT] and press the <ENTER> button, the entered name will not be registered and the default
name will be used.
f If you select [OK] without entering any characters and press the <ENTER> button, the default name will be used.