


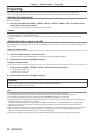

Chapter 3 Basic Operations — Projecting
ENGLISH - 59
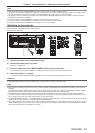
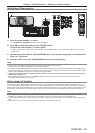
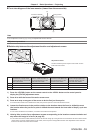
r Front view diagram of the lens mounter (viewed from the screen side)
(a)
(b) (c)
Lens mount bracket Fixing screws
Note
f Focus adjustment screws (a), (b), and (c) are adjusted with the lens attached.
Adjustment procedure
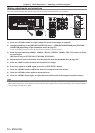
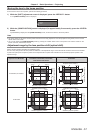
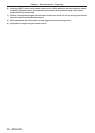
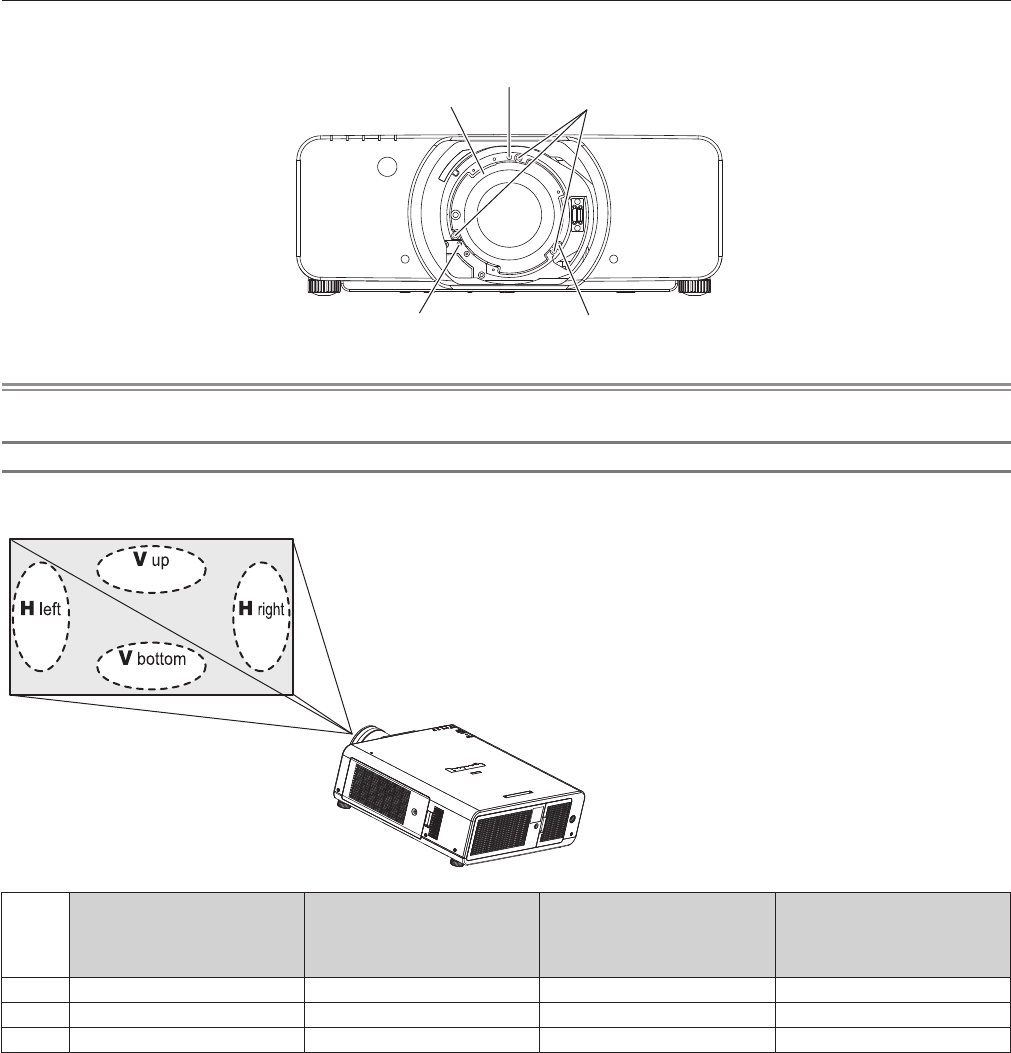
r Relationship between the adjustment location and adjustment screws
(b) (c)
(b)+(c)
(a)
Adjustment location:
Location where the just focus point of the screen is in the
inner side of the screen
When the just focus point of
the screen in V up (top in the
vertical direction) is in the inner
side of the screen
When the just focus point of the
screen in V bottom (bottom in
the vertical direction) is in the
inner side of the screen
When the just focus point of
the screen in H left (left in the
horizontal direction) is in the
inner side of the screen
When the just focus point of the
screen in H right (right in the
horizontal direction) is in the
inner side of the screen
(a) Rotate counterclockwise ― ― ―
(b) ― Rotate counterclockwise Rotate counterclockwise ―
(c) ― Rotate counterclockwise ― Rotate counterclockwise
1) Press the <FOCUS> button on the remote control or the <LENS> button on the control panel to
display the [FOCUS] adjustment menu.
2) Press s to shift the focus of the entire screen once.
3) Press a to stop on any part of the screen to be the first just focus point.
f For the location where focus is shifted in this state, the just focus point is on the inner side of the screen.
4) Loosen the fixed screws in the position relative to the location where the focus is shifted the most
(the location where the just focus point is shifted the most towards the inner side in Step 2)) up to two
rotations.
f Turn screws clockwise in two locations, or at least in one location to be adjusted.
5) Little by little, turn the focus adjustment screws corresponding to the locations counterclockwise and
stop where the image is in focus. (x page 58)
f If the screws are turned counterclockwise, the tilt of the lens will change by moving the lens mount bracket of the lens mounter forward
(screen side), and in the projected image on the screen, the focus point in the opposite direction of the adjustment screws will move
from the inner side of the screen to the outside.