


Create a Print File 35
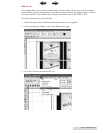
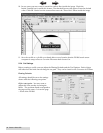
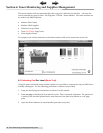
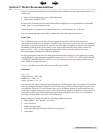
2. Add a barcode by clicking the shapes button on the left side tool bar. Click the Barcode button.
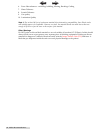
3. A barcode toolbar will appear at the top of the screen. Here you can enter your barcode type
and the value. Click Apply when you are ready to insert the barcode.
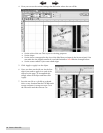
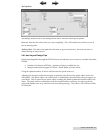
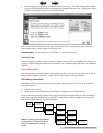
4. A cursor will appear. Place the cursor where you would like to insert your barcode and click
once. You can make any adjustments to the position once the barcode is in place.
5. Repeat the procedure for each image on the page.
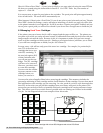
5.6 Recommended Image format for imported Graphics
For the best quality prints, files should be imported in the following format:
1. EPS format (Encapsulated Post Script). Saving to EPS format is possible with such programs as
Adobe Illustrator and Corel Draw by using the File - Save As command. Use all the program
default settings for the EPS format except those specifically mentioned below.
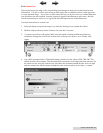
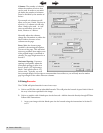
2. Save with fonts imbedded. Saving to EPS format with fonts imbedded is possible with such
programs as Adobe Illustrator and Corel Draw by using the File - Save As command. Before saving
a window will appear which will gives you this option.
3. Resolution = 300 dpi or vector based. If the label design was entirely designed in Adobe Illustrator,
dpi does not apply because it will be vector based. If portions of the design such as photographs
were imported make sure the image your are importing is at least 300 dpi.
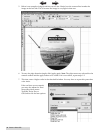
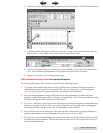
4. Save in CMYK color mode. Setting the color space should be done before you begin designing or
picking colors. However it can be changed at any time before you save as EPS.
5. The page size of the file should match the image size. In other words all, proof information should
be removed from the document. PTPrint only needs the image itself. This is referred to as the Art
board in Adobe Illustrator.
TOC
INDEX