


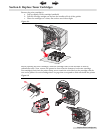


46 Maintenance and Troubleshooting
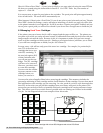
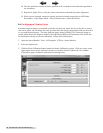
5. Type the printers IP address in the address bar. To find the printers IP address navigate the
printer's control panel - Network/Ports - TCP/IP - Address.
6. A printer settings page will appear. Go to the Configuration Menu.
7. Click on "Color Samples"
8. Choose "Off CMYK" or "US CMYK". These choices correspond to color matching settings
available in the printer driver.
9. Click Print.
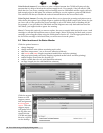
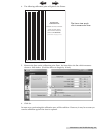
Not all colors will be printed on this job. To focus in more on specific colors you can click the
Detailed Samples button on the color samples screen. This will allow you to enter specific CMYK
values and a variation increment. The smaller the increment, the closer to the original CMYK value
all the swatches will be. We recommend a increment of 2 or 3 when focusing in on specific CMYK
values.
Tip! When typing in specific CMYK values, we recommend setting K to 0 to get more vibrant swatches.
Note: Be sure to switch the Size/Type back to Universal/Custom Type 5 via the Control Panel before sending
another print job.
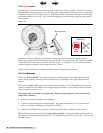
9.2 Color/Alignment Calibration
Color calibration occurs automatically every 500 pages, when a new cartridge or ITU is installed,
if power saver has been on for more than 8 hours and at other points if one of several internal
parameters has exceeded a threshold. You will see the Calibrating... notice on the printers control
panel when the calibration is taking place. This calibration is used for color accuracy and pixel
(print head) alignment. See Section 9.3 for more information on Print Head Alignment.
You can force the printer to perform this calibration using these instructions.
Press Menu on the Printers Control Panel - Select Settings - Select Quality Menu - Select Color
Adjust (last item on list). The printer will calibrate for several minutes.
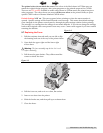
9.3 Print Head Alignment
Pixel shifting can be caused by a misaligned print cartridge. This usually occurs after a new
cartridge is installed. Try the following:
A. First do an auto alignment from the standard printer control panel. Press Menu - Select Settings
- Select Quality Menu - Color Adjust (last item on list). The printer will calibrate for several
minutes.
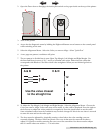
B. Perform a manual alignment for the specific color that is out of alignment (usually the same as
the last replaced cartridge) from the Diagnostic menu.
1. On the printer's control panel, set the default source to Tray 1. Press Menu - Select Paper
Menu - Select Default Source - Select Tray 1.
TOC
INDEX