1394 Interface Unit Type 4510
25
2
1394 Interface Unit Type 4510
Note
❒ Depending on the model you use,
the 1394 Interface Unit, the Net-
work Interface Board, and the
802.11b Interface Unit cannot be
installed in the printer at the same
time. For more information, see
p.11 “Installing Options”.
Important
❒ Printing using "SCSI print "(Win-
dows 2000) device and "IEEE 1394
and SCSI printers" (Windows XP)
with the optional 1394 Interface
Unit is possible under Windows
2000 and Windows XP. Printing
with IP over 1394 is possible under
Windows XP.
❒ With Windows 2000, the 1394 In-
terface Unit can only be used with
Service Pack 1 or later. If the Serv-
ice Pack is not installed, the con-
nectable SCSI print device in a
1394 bus is only one, and the client
cannot install the printer driver
without using an account with Ad-
ministrators permission.
❒ Before touching the 1394 Interface
Unit, touch something metal to
discharge any static electricity.
Static electricity can damage the
1394 Interface Unit.
❒ Unplug all the interface cables
from the printer before installa-
tion. If you take out the controller
board with cables plugged in, the
1394 Interface Unit might be dam-
aged.
❒ Use the 1394 interface cable that
comes with this printer.
❒ Do not plug or unplug the 1394 in-
terface cable while installing the
printer driver.
Installing the 1394 Interface
Unit
A
AA
A
Check the contents of the box for
the following items:
• 1394 Interface Unit
• 1394 Interface Cable (6 pins x 4
pins)
• 1394 Interface Cable (6 pins x 6
pins)
• Installation Guide
B
BB
B
Confirm that the followings are
true:
• The power switch is turned off.
• The interface cable is un-
plugged from the printer.
Note
❒ If the Duplex Unit is not at-
tached, go to step
D
.
C
CC
C
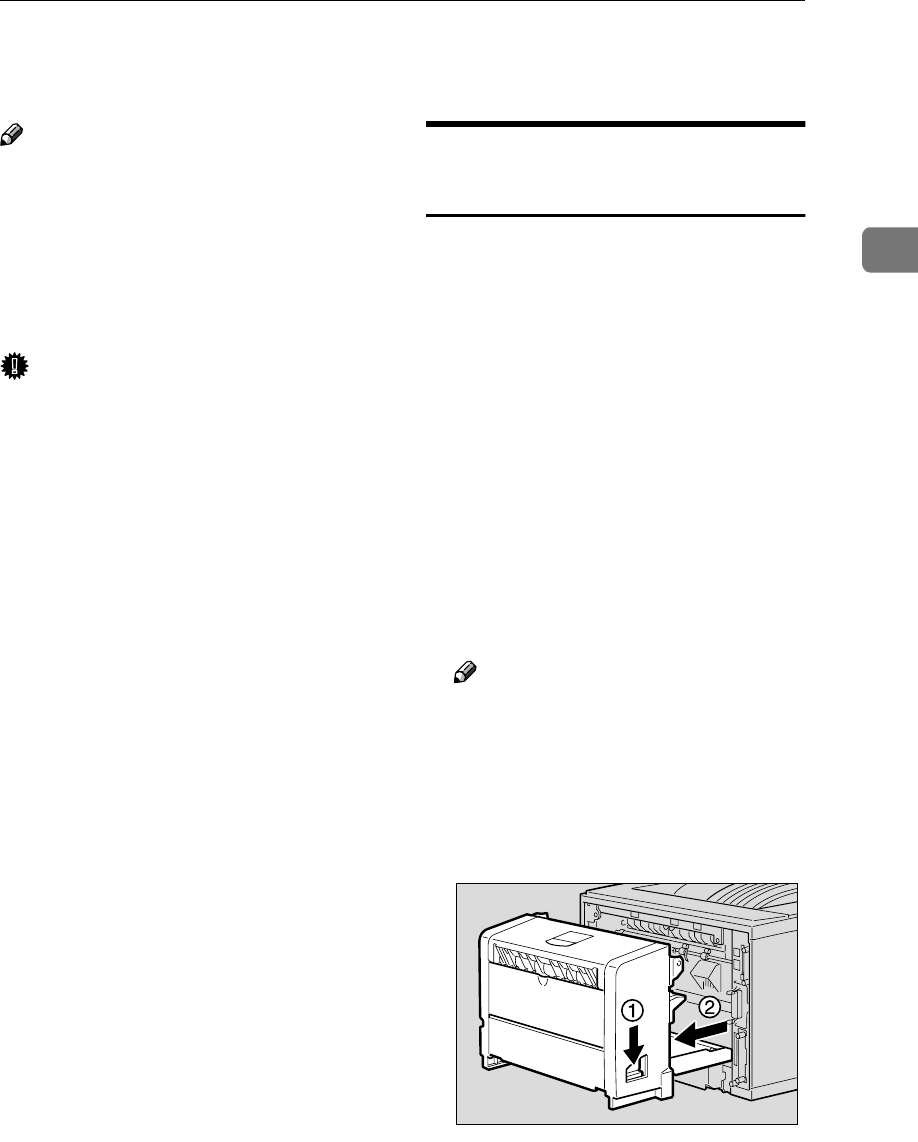
If the Duplex Unit is attached,
push down the lever on right side
(A
AA
A) and pull out the Duplex Unit
until it stops (B
BB
B).
ZGDX320J


