


16
QUICK START
Sampling Your Own Sounds
Here, let’s try sampling to Pad 1 in Sample Bank B, which has
had no samples assigned to it at the factory.
Unauthorized sampling from a CD, record, tape, video
production, or broadcast whose copyright is owned by a
third party is forbidden by law, with the exception of
special cases such as private use.
Lifting the SP-303’s
Memory Protection
The SP-303’s “
Protect
” (memory protection) is turned
on
at
the factory to prevent accidental overwriting or deletion of
the samples and demo pattern stored in the SP-303’s memory.
If you attempt to sample, delete, record patterns, or carry out
other such operations while Protect is left on, “Prt” appears
in the display, and no further operations are permitted.
When you first sample or record after purchasing the SP-303,
use the procedure below to lift the Protect function.
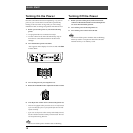
1. Turn off the power.
2. Hold down [CANCEL] and slide the POWER switch to
ON.
This removes the protection (Protect Off).
* The Protect setting is stored even after the power is turned off,
so once you turn off the protection after purchase of the SP-
303, it remains off afterwards.
* If you want to turn Protect on again, hold down [REMAIN]
while switching ON the POWER switch.
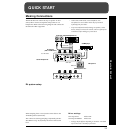
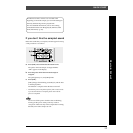
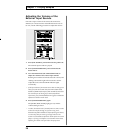
fig.Q10
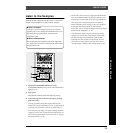
1. Refer to p. 11 for instructions on connecting CD and
MD players, microphones, and other devices.
2. Press BANK [B], and confirm that the button has lit.
3. Press [REC] and confirm that the button has lit.
The SP-303 switches to sampling standby mode, and a
pad that has no sample assigned to it is automatically
selected and begins blinking.
* If you now decide not to sample, press [CANCEL].
[REC] light goes out.
4. Press pad 1.
When Pad 1 is pressed, the other pad lights go out.
[REC] will blink.
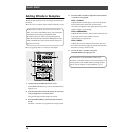
5. Adjust the sampling level.
● While playing back the sampled sound, then turn the
CTRL 3/MFX (LEVEL) knob, adjusting the level so that
the PEAK indicator lights up only from time to time.
* If the PEAK indicator does not light even when the CTRL 3/
MFX (LEVEL) knob is turned fully clockwise, it may be that
the volume level of the device connected to the input is too low.
While there is no particular problem with sampling under
these conditions, we recommend that the volume of the
connected input device be turned up until the PEAK indicator
lights up from time to time.
● When sampling with a mic, turn the MIC LEVEL knob
completely to the right (clockwise), then adjust the level
so that the PEAK indicator lights up only from time to
time.
* If the sound input is distorted, turn the MIC LEVEL knob to
the left (counterclockwise) until the sound is no longer
distorted.
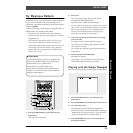
6. Playback of the sound you want to sample, then press
[REC] at the point where you want the sampling to
begin.
The [REC] button will blink, and sampling will start.
7. Press [REC] at the point you want the sampling to end.
This completes the sampling, and the pad and [REC]
lights go out.
* If the available sampling time is exceeded, “FuL” appears in
the display, and sampling stops automatically. Refer to the
“Message List” (p. 69) for an explanation of the message
content.
8. Press pad 1, and you will hear the sound that you just
sampled.