


33
Chapter 3. Sampling
Chapter
3
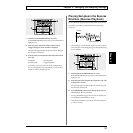
5. Turn the CTRL 3/MFX (LEVEL) knob to adjust the
sampling level so that the PEAK indicator lights only
from time to time.
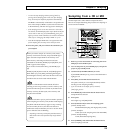
6. Press [REC], and confirm that the button is blinking.
The bank buttons and pads that are available for holding
samples then blink.
7. Select the bank and pad to which the sample after
resampling is to be assigned.
Here, select Pad 4 in Bank B.
Press BANK [B], and confirm that the button has lit, then
press Pad 4.
The Pad 4 will light.
* You cannot resample to the same pad as the source sample’s.
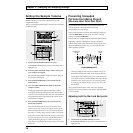
8. Press [LONG/LO-FI] to select the sampling grade.
[LONG/LO-FI] not lit:
STANDARD (Sampling with high-quality sound)
[LONG/LO-FI] lit:
LONG (Twice the sampling time of STANDARD)
[LONG/LO-FI] blinking:
LO-FI (Extended sampling time)
9. Press [STEREO] to select either stereo or mono
sampling.
[STEREO] lit: Stereo sampling
[STEREO] not lit: Mono sampling
10. Press [REC], and confirm that the button has lit.
* Resampling does not yet start at this point.
11. Press the pad to which the source sample has been
assigned.
Press BANK [A], and confirm that the button has lit, then
press Pad 1.
The sample assigned to Pad 1 begins playing, while
resampling starts simultaneously.
Never turn off the power while resampling is in
progress. Turning off the power here may result in
corruption not only of the sample currently being made,
but other samples as well.
12. When you reach the point where you want sampling to
stop, press [REC].
[REC], pad, and the effect button lights go out and
resampling ends.
BANK [A] light goes out, and BANK [B] lights up.
13. When you press Pad 4, the sound that was just
resampled is played back.
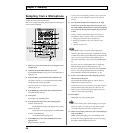
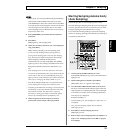
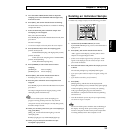
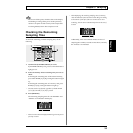
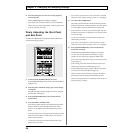
Deleting an Individual Sample
To delete only a single sample, use the following procedure.
fig.r03-06
1. Confirm that [PATTERN SELECT] is not lit.
If [PATTERN SELECT] is lit, press it so that the button’s
light goes out.
2. Press [DEL], and confirm that the button has lit.
“dEL” appears in the display, and the pads to which
samples are assigned begin to blink.
* If there are no samples assigned to any of the pads, “EMP”
appears in the display for several seconds, and you cannot
proceed with the deletion.
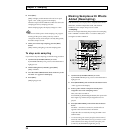
3. Press the bank button and pad for the sample you want
to delete.
The selected pad lights up, and [DEL] blinks again.
* If you press a pad to which no sample is assigned, nothing will
happen.
* If you decide not to delete, press [CANCEL].
4. Press [DEL].
[DEL] lights up, and the dots in the display blink.
During the deletion process, all Pads from [1] through [8]
will at first light up, then go out one by one (starting
with [1]), indicating the progress of the deletion.
The deletion is completed when the dots stop blinking
and remain off.
* Note that the deletion process may take up to approximately
one minute or longer to complete.
Never turn off the power while the dots are blinking in
the display. Turning off the power at this point may
result in corruption of data not only in the sample that
was being deleted, but in other samples as well.