


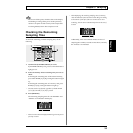

30
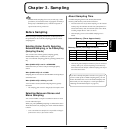
Chapter 3. Sampling
* If you select mono sampling with stereo input, the same sound
is recorded to the left and right channels. In this case, the
stereophonic dimension is lost, but since the number of voices
is halved, the memory used is half that used in stereo; make
this setting according to your usage needs.
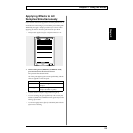
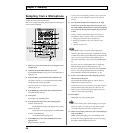
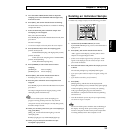
9. Start playback of the CD or MD, turn the CTRL 3/MFX
(LEVEL) knob to adjust the sampling level so that the
PEAK indicator lights only from time to time.
When you finish making this adjustment, stop the CD/
MD player, and put it once again in play-standby mode.
If the BPM (tempo) is set prior to the beginning of
sampling, then when sampling is completed, the timing
at which the sound stops (the End Point) is automatically
set to occur on a beat in time with the BPM value in effect
when the button was pressed, and [MARK] lights up.
For more on how to set the BPM, refer to “Sampling
With the Tempo Specified Beforehand”.
For more on how to set the End Point, and on [MARK],
refer to “Preventing Unneeded Portions from Being
Played (Markers/Start Point/End Point)” (p. 38).
10. If you want to add effects while sampling, press the
effect button at this point.
The pressed effect button lights up, and the effect is
added to the sound from the CD/MD.
* At this point, you can turn the CTRL 1 and CTRL 2 knobs to
adjust the amount and quality of the effect. However, the
CTRL 3 knob is used for adjusting the sampling level, and
cannot be used for adjusting the effect.
11. Start playback of the CD/MD, using the timing at
which you want sampling to begin, press [REC].
[REC] lights up, and sampling starts.
Never turn off the power while sampling is in progress.
Turning off the power at this point may result in
corruption not only of the sample currently being made,
but other samples as well.
12. When you reach the point where you want sampling to
stop, press [REC].
[REC] and the pad 3 light go out and sampling ends.
If effects were being applied while you were sampling,
the light of effects buttons also go out.
* You can also stop sampling without pressing [REC] by
pressing the lit (sampling) pad. In this case, after sampling
stops, the sound just sampled is played back automatically.
The BPM is automatically calculated according to the
time of the sample (if BPM is set, the time from the Start
to the End Point), and that value appears in the display.
* If the sampling time is two or more measures or is less than
one measure, the BPM display value may be double or half the
correct value. In this case, press [TIME/BPM], getting it to
light up, and turn CTRL 2 (BPM) to correct this to the desired
value (refer to “Changing the Sample's BPM” on p. 41).
* Note that the displayed BPM value is an approximate value
for the sampling time, and may not be entirely accurate.
13. Press the pad 3, and you will hear the sound that you
just sampled.
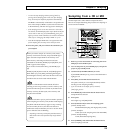
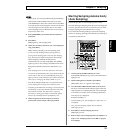
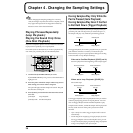
Sampling With the Tempo
Specified Beforehand
When the BPM (tempo) is set while the SP-303 is in sampling
standby mode, then when sampling is completed, the timing
at which the sound stops (the End Point) is automatically set
to occur on a beat in time with the BPM value in effect when
the button was pressed.
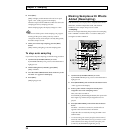
fig.r03-03
1. Refer to Steps 1–8 of “Sampling From a Microphone”
or Steps 1–9 of “Sampling From a CD or MD” to
prepare for sampling.
2. Press [TIME/BPM], and confirm that the button has lit.
3. Turn the CTRL 2 (BPM) knob to set the BPM.
Turning the knob to the right increases the BPM (faster
tempo); turning the knob to the left decreases the BPM
(slower tempo). If the knob is turned completely to the left,
then “---” is displayed, and the tempo setting is cleared.
Settings range: 40–200