


34
Chapter 3. Sampling
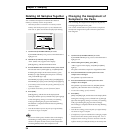
Deleting All Samples Together
You can delete all samples from the SP-303’s internal
memory or memory card in one operation.
* When this procedure is carried out on a memory card, the
memory card’s backup area (refer to p. 48) is deleted at the
same time. So, please check the data carefully before deleting.
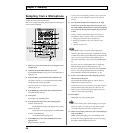
fig.r03-07
1. Confirm that [PATTERN SELECT] is not lit.
If [PATTERN SELECT] is lit, press it so that the button’s
light goes out.
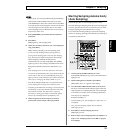
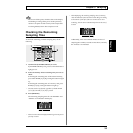
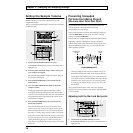
2. Hold down [CANCEL] and press [DEL].
“dAL” (Delete ALL) appears in the display.
[DEL] lights up, and the bank buttons blink.
3. Press the BANK button to select the memory to be cleared.
The selected memory bank lights up, and [DEL] blinks.
If deleting the samples in the internal memory, press
BANK [A] or [B]; if deleting the samples on a memory
card, press BANK [C] or [D].
When BANK [A] or [B] is pressed, both [A] and [B] light up.
When BANK [C] or [D] is pressed, both [C] and [D] light up.
* If no memory card is inserted, then pressing BANK [C] or [D]
creates no response.
* If you decide not to delete, press the [CANCEL] button.
4. Press [DEL].
[DEL] lights up, and the dots in the display blink.
During the deletion process, all Pads from [1] through [8]
will at first light up, then go out one by one (starting
with [1]), indicating the progress of the deletion.
The deletion is completed when the dots stop blinking
and remain off.
* Note that the deletion process may take up to approximately
one minute or longer to complete.
Never turn off the power while the dots on the display
are blinking. Turning off the power at this point may
result in corruption of data not only in the sample that
was being deleted, but in other samples as well.
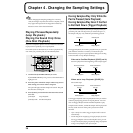
Changing the Assignment of
Samples to the Pads
You can change the assignment of samples to the pads by
exchanging the samples of two pads.
You can also switch between a pad to which a sample has
already been assigned and a pad to which no pattern has
been assigned.
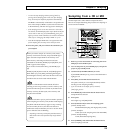
fig.r03-08
1. Confirm that [PATTERN SELECT] is not lit.
If [PATTERN SELECT] is lit, press it so that the button’s
light goes out.
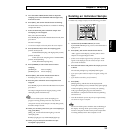
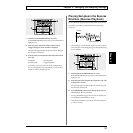
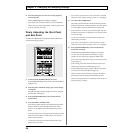
2. While holding down [DEL], press [REC].
“CHG” appears in the display, and [DEL] and [REC]
light up.
The pads to which the samples are assigned then blink.
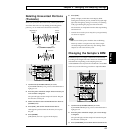
3. Press the BANK button and the pad for one of the
samples to be exchanged.
The pad that is pressed remains lit.
4. Press the BANK button and the pad for the other
sample to be exchanged.
The pad that is pressed remains lit, and [REC] blinks.
Lights for pads other than the two selected go out.
* To cancel the exchange, press [CANCEL].
5. Press [REC].
[DEL] and [REC] light, and the dots in the display blink.
During the exchange process, all Pads from [1] through
[8] will at first light up, then go out one by one (starting
with [1]), indicating the progress of the exchange.
The exchange is completed when the dots stop blinking
and remain off.
* Note that the exchange process may take up to approximately
one minute or longer to complete.
* If insufficient free space is available when exchanging samples
between the SP-303's memory and a memory card, “FuL” is
displayed, and the exchange cannot be carried out. Note that
sufficient memory is needed particularly on the memory card.