


49
Chapter 6. Using Memory Cards
Chapter
6
Initializing Memory Cards
(Format)
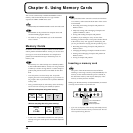
Before the SP-303 can use a newly purchased SmartMedia
card or a card which was used by another device, the card
must be formatted (initialized) by the SP-303.
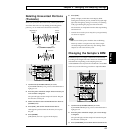
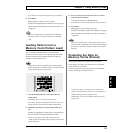
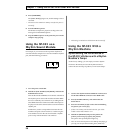
fig.r06-04
1. While holding down [CANCEL], press [REMAIN].
BANK [C] and [D] blinks, and “FMt” appears in the
display.
2. Press either BANK [C] or [D].
The BANK [C] and [D] lights remain on, and [DEL]
begins to blink.
* If you decide to cancel the format operation, press [CANCEL].
3. Press [DEL].
[DEL] remains lit, and formatting is executed.
The dots in the display blink while formatting is in
progress.
When the dots stop blinking and remain off, formatting
is completed.
Never turn off the power or remove the memory card
while the dots are blinking. This can result in damage to
the memory card, and may render the card unusable.
* When you format a card, all data that was in the card will be
erased.
* In some cases, a SmartMedia card which was formatted by the
SP-303 may no longer be usable by other SmartMedia-
compatible devices.
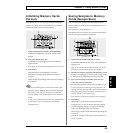
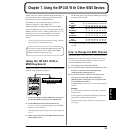
Saving Samples to Memory
Cards (Sample Save)
You can save sixteen samples from the SP-303’s internal
memory (Banks A and B) as one set to the backup area of a
memory card.
This operation is called Sample Save.
Data that has been saved in this way cannot be played back
until it is once again loaded into the SP-303.
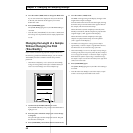
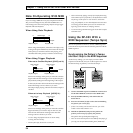
fig.r06-05
1. Confirm that [PATTERN SELECT] is not lit.
If [PATTERN SELECT] is lit, press it so that the button’s
light goes out.
* Take care to note that if [PATTERN SELECT] is lit, the SP-
303 will then proceed with the Pattern Save operation.
2. Hold down [CANCEL] and press either BANK [C] or [D].
BANK [C] and [D] light up, and the pads corresponding
to blank portions of the backup area begin to blink.
3. Press a pad to specify the number of the area into
which you wish to save the data.
Pressed pads remain lit, and the other pad lights go out.
* You can select an area number by pressing a pad that is not
blinking (excluding a pad [8]). Take care to note here that any
data already saved to that area number is overwritten if you
continue with the current data to saving.
* If you decide to cancel the Save operation, press [CANCEL].
4. Press [REC].
[REC] lights up, and the dots in the display blink.
During the save process, all Pads from [1] through [8]
will at first light up, then go out one by one (starting
with [1]), indicating the progress of the save.
The saving is completed when the dots stop blinking and
remain off.
* Note that the save process may take up to approximately one
minute to complete.
2
1
3
2
3
4
1