28
Chapter 3. Sampling
Sampling from a Microphone
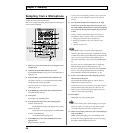
Sample the microphone input (mono).
Here is an example describing the procedure for sampling in
mono to Pad 2 in Bank B.
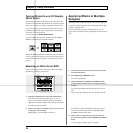
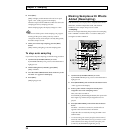
fig.r03-01
1. Refer to p. 11 for instructions on connecting the mic to
the MIC jack.
2. Confirm that [PATTERN SELECT] is not lit.
If [PATTERN SELECT] is lit, press it so that the button’s
light goes out.
3. Press the [REC], and confirm that the button has lit.
The pads to which you can sample then blink, and the
SP-303 goes into sampling standby.
* If you now decide not to sample, press [CANCEL].
[REC] light goes out.
4. Press BANK [B], and confirm that the button has lit.
Sample Bank B is selected.
5. Press pad 2.
Pad 2 lights up, and [REC] blinks.
6. Press [LONG/LO-FI] to select the sampling grade.
[LONG/LO-FI] not lit:
STANDARD (Sampling with high-quality sound)
[LONG/LO-FI] lit:
LONG (Twice the sampling time of STANDARD)
[LONG/LO-FI] blinking:
LO-FI (Extended sampling time)
7. If [STEREO] is lit, then press [STEREO] so that the
light goes out.
Mono sampling is selected.
* You can select stereo sampling with mono input. In this case,
the number of voices is doubled, which also uses twice the
memory.
8. Turn the MIC LEVEL knob completely to the right
(clockwise), while directing sounds into the mic, turn
the CTRL 3/MFX (LEVEL) knob to adjust the sampling
level so that the PEAK indicator lights only from time
to time.
* Howling could be produced depending on the location of
microphones relative to speakers. This can be remedied by:
1. Changing the orientation of the microphone(s).
2. Relocating microphone(s) at a greater distance from
speakers.
3. Lowering volume levels.
If the BPM (tempo) is set prior to the beginning of
sampling, then when sampling is completed, the timing
at which the sound stops (the End Point) is automatically
set to occur on a beat in time with the BPM value in
effect when the button was pressed, and [MARK] lights
up.
For more on how to set the BPM, refer to “Sampling
With the Tempo Specified Beforehand” (p. 30).
For more on how to set the End Point, and on [MARK],
refer to “Preventing Unneeded Portions from Being
Played (Markers/Start Point/End Point)” (p. 38).
9. If you want to add effects while sampling, press the
effect button at this point.
The pressed effect button lights up, and the effect is
added to the sound from the mic.
* At this point, you can turn the CTRL 1 and CTRL 2 knobs to
adjust the amount and quality of the effect. However, the
CTRL 3 knob is used for adjusting the sampling level, and
cannot be used for adjusting the effect.
10. Press [REC].
[REC] lights up, and sampling starts.
Never turn off the power while sampling is in progress.
This may result in corruption not only of the sample
currently being made, but other samples as well.
11. When you reach the point where you want sampling to
stop, press [REC].
[REC] and the pad lights go out, and sampling ends.
If effects were being applied while you were sampling,
the lights of effects buttons also go out.
9
8
7
4
2
6
3,
10
,
11
5,
12
8


