Settings 105
Settings
Configuring DMZ
1. Ensure you’ve enabled DMZ. See “Enabling DMZ” on page 104.
2. Click Advanced settings > Router > DMZ.
3. Specify the computer that you want exposed to the Internet: in the Destination IP Address
field, enter the IP address of the computer. (If you don’t know how to find the IP address, see
“Finding the IP Address” on page 123.)
4. In the Source IP Address section, specify what incoming traffic (not handled by port
forwarding, port triggering, or NAT) to forward to this computer.
To forward all incoming traffic, click
Any.
— or —
To forward incoming traffic from certain IP addresses:
Ⅲ Click
Restriction.
Ⅲ In the two
additional fields that are displayed, enter the start and end IP addresses of a
range.
5. Using the DHCP Static IP Assignment List, assign an IP address based on the MAC address
of the computer that is in the DMZ. See “Assigning an IP Address Based on a MAC Address”
on page 100.
— or —
On the computer that is in the DMZ, disable DHCP
, and manually assign the IP address,
gateway, and DNS server.
Resetting the Software to Default Settings
WARNING:
If you reset the software to default settings:
• You must go through the device setup (page 20), as if you've just purchased the device.
• Any changes you’ve made to the settings are lost.
Your 3G and 4G account information is not af
fected; after reset, the device remains
provisioned for service.
You’ll need to reset the software to default settings if:
● Y
ou’ve forgotten the administrator password.
● Y
ou’ve changed the DHCP settings such that the device is inoperable (for example, there’s no
communication with the device).
You have two options to initiate the reset:
● Thr
ough the software. See “Resetting the Software to Default Settings (Through the Browser
Interface)” on page 107.
● Thr
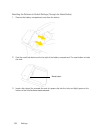
ough the reset button on the device. See the following section.


