


C H A P T E R 2
Installingyour interactivewhiteboard system
8 smarttech.com/kb/170401
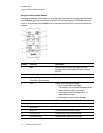
Choosing a location
Choose a location for your interactive whiteboard system that’s farfrom bright light sources, such as
windows and strong overhead lighting. Bright light sources can cause distracting shadows on your
interactive whiteboard and can reduce the contrast of the projected image.
Select a wall with a flat, regular surface and sufficient clearance to accommodate your interactive
whiteboard system. Install the projector and your interactive whiteboard on the same flat surface. For
best presentation alignment, mount your interactive whiteboard system in a location that’s central to
your audience’s viewing direction.
For mobile or adjustable installation options, contact your authorized SMART reseller.
W A R N I N G
l Refer to your interactive whiteboard system’s specifications (available at
smarttech.com/support) for its weight. Check your local building codes to ensure that your
wall can support this weight, and use appropriate mounting hardware for your wall type.
l If you are installing the interactive whiteboard system on drywall, use all the included toggle
bolts. If one of the bracket holes aligns with a wall stud, use appropriate hardware in that hole
instead of a toggle bolt.
C A U T I O N
If you’re replacing a SMARTBoard 500 or 600 series interactive whiteboard with the SMARTBoard
800 series interactive whiteboard on drywall, you must remove the wall-mount bracket and
mounting hardware, and then install all the mounting hardware and brackets supplied with your
SMARTBoard 800 series interactive whiteboard instead.
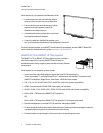
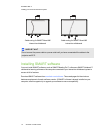
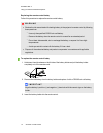
To help ensure that your interactive whiteboard is mounted correctly, make sure the colors of the
wall-mount hanger on the back of the interactive whiteboard and the wall-mount bracket are the same.
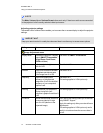
Choosing a height
SMART includes a mounting template with each interactive whiteboard system. If you lose this
template, contact your authorized SMART reseller. Using this template ensures that you can do the
following:
l Mount the projector at a safe height for head space clearance, while maintaining enough space
for airflow and installation access above the unit.