


C H A P T E R 5
Maintainingyour interactivewhiteboardsystem
40 smarttech.com/kb/170401
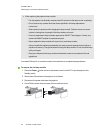
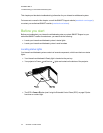
4. Replace the lamp cover.
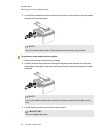
5. Connect the power cable to the wall outlet.
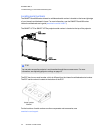
6.
Press the Power button once on the remote control or ECP to confirm that the projector is
operating and that the lamp module is correctly installed.
7. Put the old lamp module in a secure container, and handle it gently until you recycle it.
To finish the projector lamp module installation
1. Turn on the projector.
2. Adjust the projector image if necessary (see Adjusting the image on page 21).
3. Access the service menu to reset the lamp hours (see Resetting the lamp hours below).
4. Activate the projector’s alert e-mails and lamp warnings if they’ve been deactivated (see E-mail
alerts on page 63 and Control panel on page 58).
Resetting the lamp hours
After you replace the lamp module, you need to access the projector service menu and reset the lamp
hours. To prevent accidental errors, only a system administrator should perform this procedure.
N O TE
Always reset the lamp hours after you replace the lamp, because lamp service reminders are based
on the current hours of use.
To reset the lamp hours
1. Using the remote control, press the following buttons quickly to access the service menu:
Down, Up, Up, Left, Up.
C A U T I O N
Do not adjust any settings in the service menu other than those listed in this guide. Changing
other settings can damage or affect the operation of your projector and may invalidate your
warranty.