


9-7
SOLUTIONS TO COMMON PROBLEMS
9
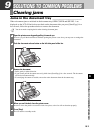
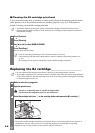
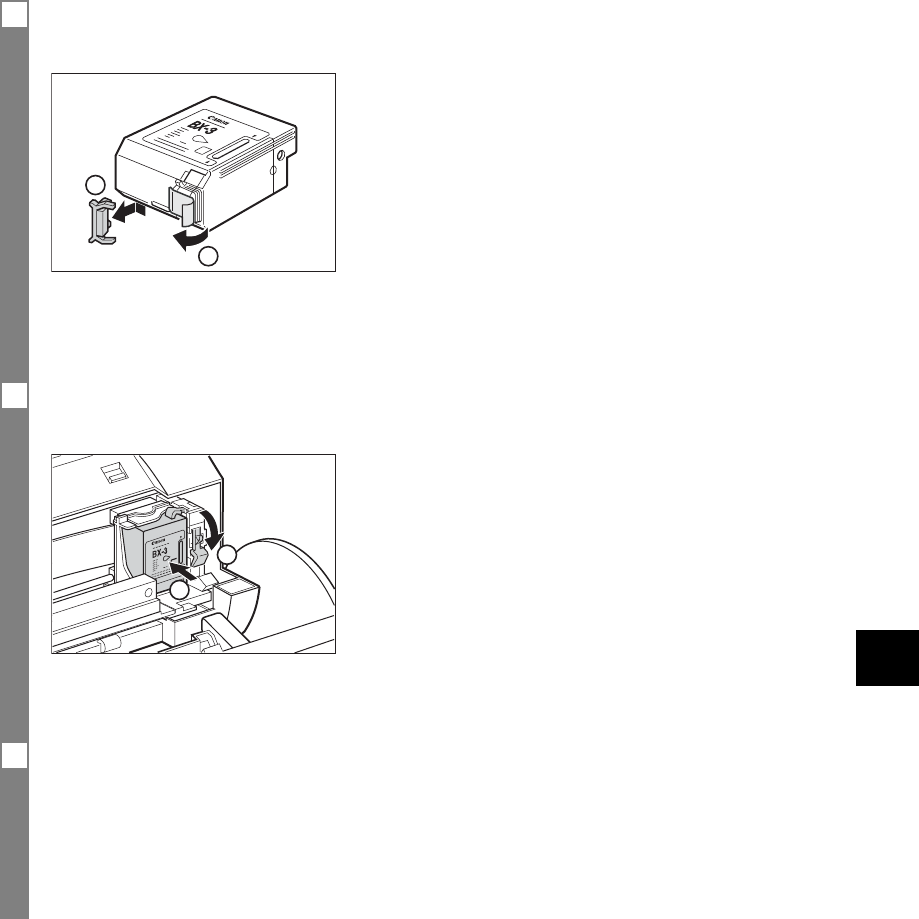
4 Remove the new BJ cartridge from its package, then remove the orange protective cap q
and tape w.
1
2
• Discard the cap and tape. Never attempt to reattach them to the BJ cartridge print head.
• Install the BJ cartridge immediately after removing the cap and tape.
• Spilled ink can stain any surface; protect yourself and your work area.
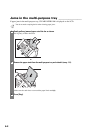
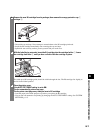
5 With the label facing outwards, insert the BJ cartridge into the cartridge holder q. Lower
the cartridge lock lever w until you hear a click to lock the cartridge in place.
1
2
The white post (BJ cartridge guide) should be visible through the slot. The BJ cartridge tilts slightly to
the left in the loaded position.
6 Close the printer cover.
If the AUTO TEST PRINT setting is set to ON:
The fax automatically prints a test page.
The fax prints a test page every time you insert a BJ cartridge.
• Load the paper in the multi-purpose tray before you replace the BJ cartridge.
•You can turn off automatic test printing by changing the AUTO TEST PRINT setting. See SYSTEM
SETTINGS, p. 8-5.