


Chapter 6: Advanced Chassis Setup
6-9
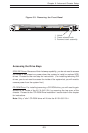
6-5 Power Supply
The SuperServer 6113L-8/6113L-i has a single 500 watt power supply, which is
auto-switching capable. This enables it to automatically sense and operate with
either a 100v or 240v input voltage. An amber light will be illuminated on the
power supply when the power is off. An illuminated green light indicates that the
power supply is operating.
Power Supply Failure
If the power supply unit fails, the system will shut down and you will need to
replace the unit. Replacement units can be ordered directly from Supermicro
(see contact information in the Preface). As there is only one power supply unit
in the 6113L-8/6113L-i, power must be completely removed from the server before
removing and replacing the power supply unit for whatever reason.
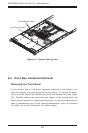
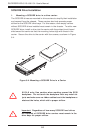
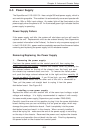
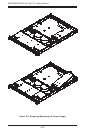
Removing/Replacing the Power Supply
1. Removing the power supply:
First turn the power switch on the control panel off, then unplug the
power cord from the system. Remove the chassis cover by pressing the
two release buttons on the top of the chassis (near the front) and push
the chassis top rearward about one inch. To remove the failed power
unit, push the beige colored release tab to the right and then carefully lift
the unit up about 1/2 inch only. If you lift too high, you may damage the
power distribution board that the other end of the unit is connected to.
Then, pull the power unit straight back to unplug it from the power
distribution board. See Figure 6-6.
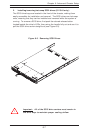
2. Installing a new power supply:
Replace the failed unit with another unit of the same input voltage, output
voltage and wattage. It is highly recommended to replace it with exactly
the same model power supply (Supermicro part number: PWS-0048).
Carefully insert the new unit into position to plug it into the power distribution
board, making sure you are not holding it at too great an angle, which may
damage the power distribution board. Push it completely into the power
distribution board and seat it in the chassis. When correctly installed it
should be laying flat - make sure the end of the power supply is not sitting
on the stop in the chassis. Reconnect the power cord, replace the chassis
top cover and reposition the unit back into the rack. Finish by depressing
the power button on the chassis front control panel.